前言
有一个项目是在Windows服务器上使用nginx做中转,由于官方的Windows版本没有http_image_filter_module模块,所以导致系统web页面的图片无法显示缩略图,厂商提供的是1.15.9的版本,负责运维的同事说这个版本有漏洞,所以只能自己编译了…..
准备工作
本教程参考借鉴于陌天恒 大佬的教程:在Windows下编译Nginx并添加http_image_filter_module模块
搭建编译环境
一、下载安装微软Visual Studio 2022
下载链接 ,版本选择可以随意,Community是免费的社区版,Professional和Enterprise是需要订阅或者激活秘钥的
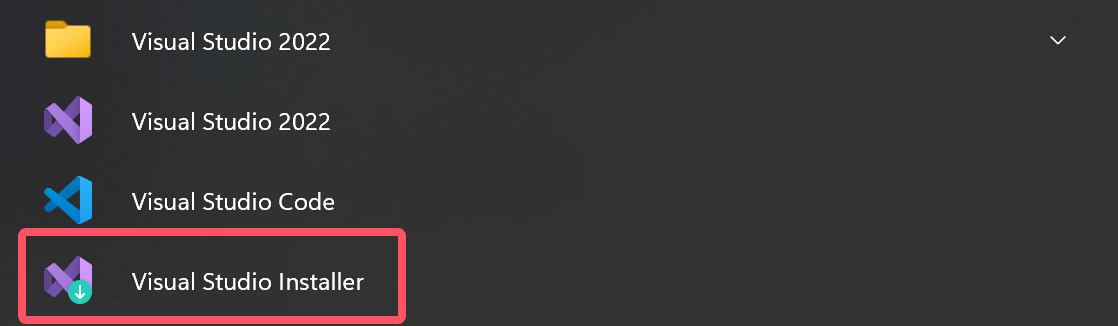
安装完之后打开Visual Studio Installer配置、下载C++相关组件,选择“使用C++的桌面开发”,下载安装完之后就可以关闭。
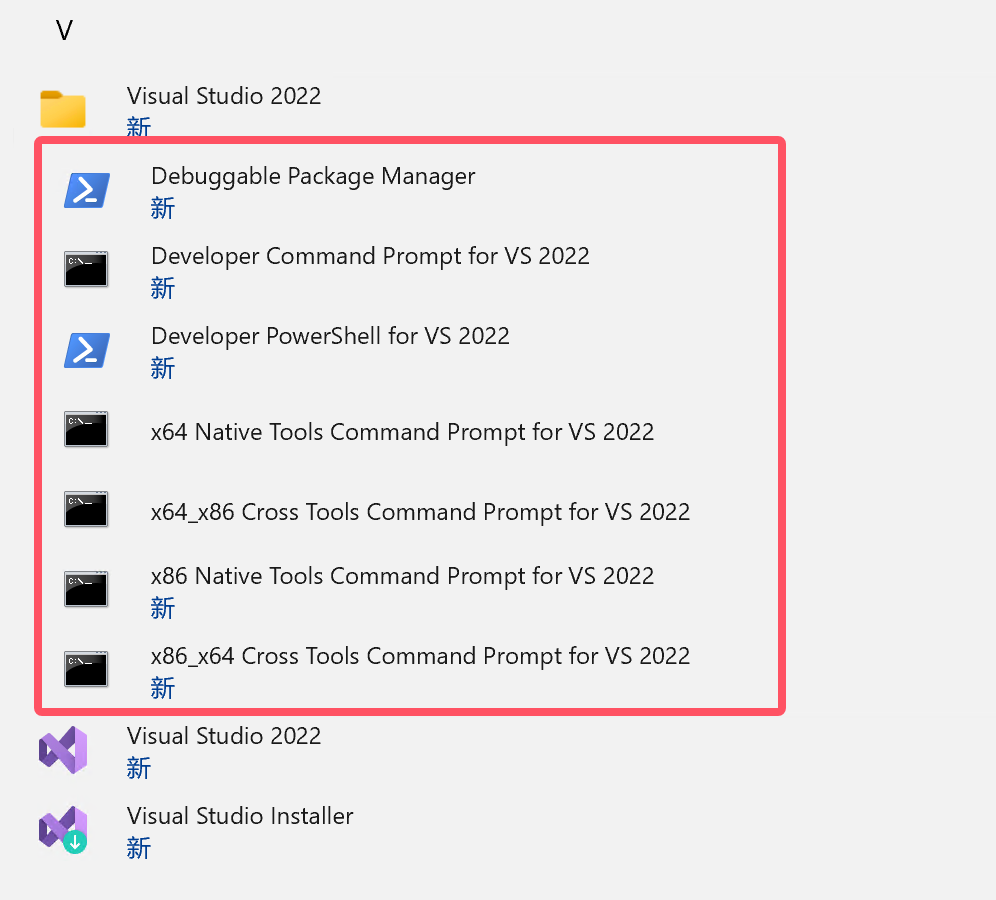
正常安装完毕之后,开始菜单会有如下快捷方式:
1、Debuggable Package Manager
2、Developer Command Prompt for VS 2022
3、Developer PowerShell for VS 2022
4、x64 Native Tools Command Prompt for VS 2022
5、x64_x86 Cross Tools Command Prompt for VS 2022
6、x86 Native Tools Command Prompt for VS 2022
7、x86 x64 Cross Tools Command Prompt for VS 2022
后续我们需要用到的就是x64 Native Tools Command Prompt for VS 2022
这里命令行的选择也是需要看你的系统是32位还是64位的,32位就选择
x86 Native Tools Command Prompt for VS 2022

二、安装MSYS
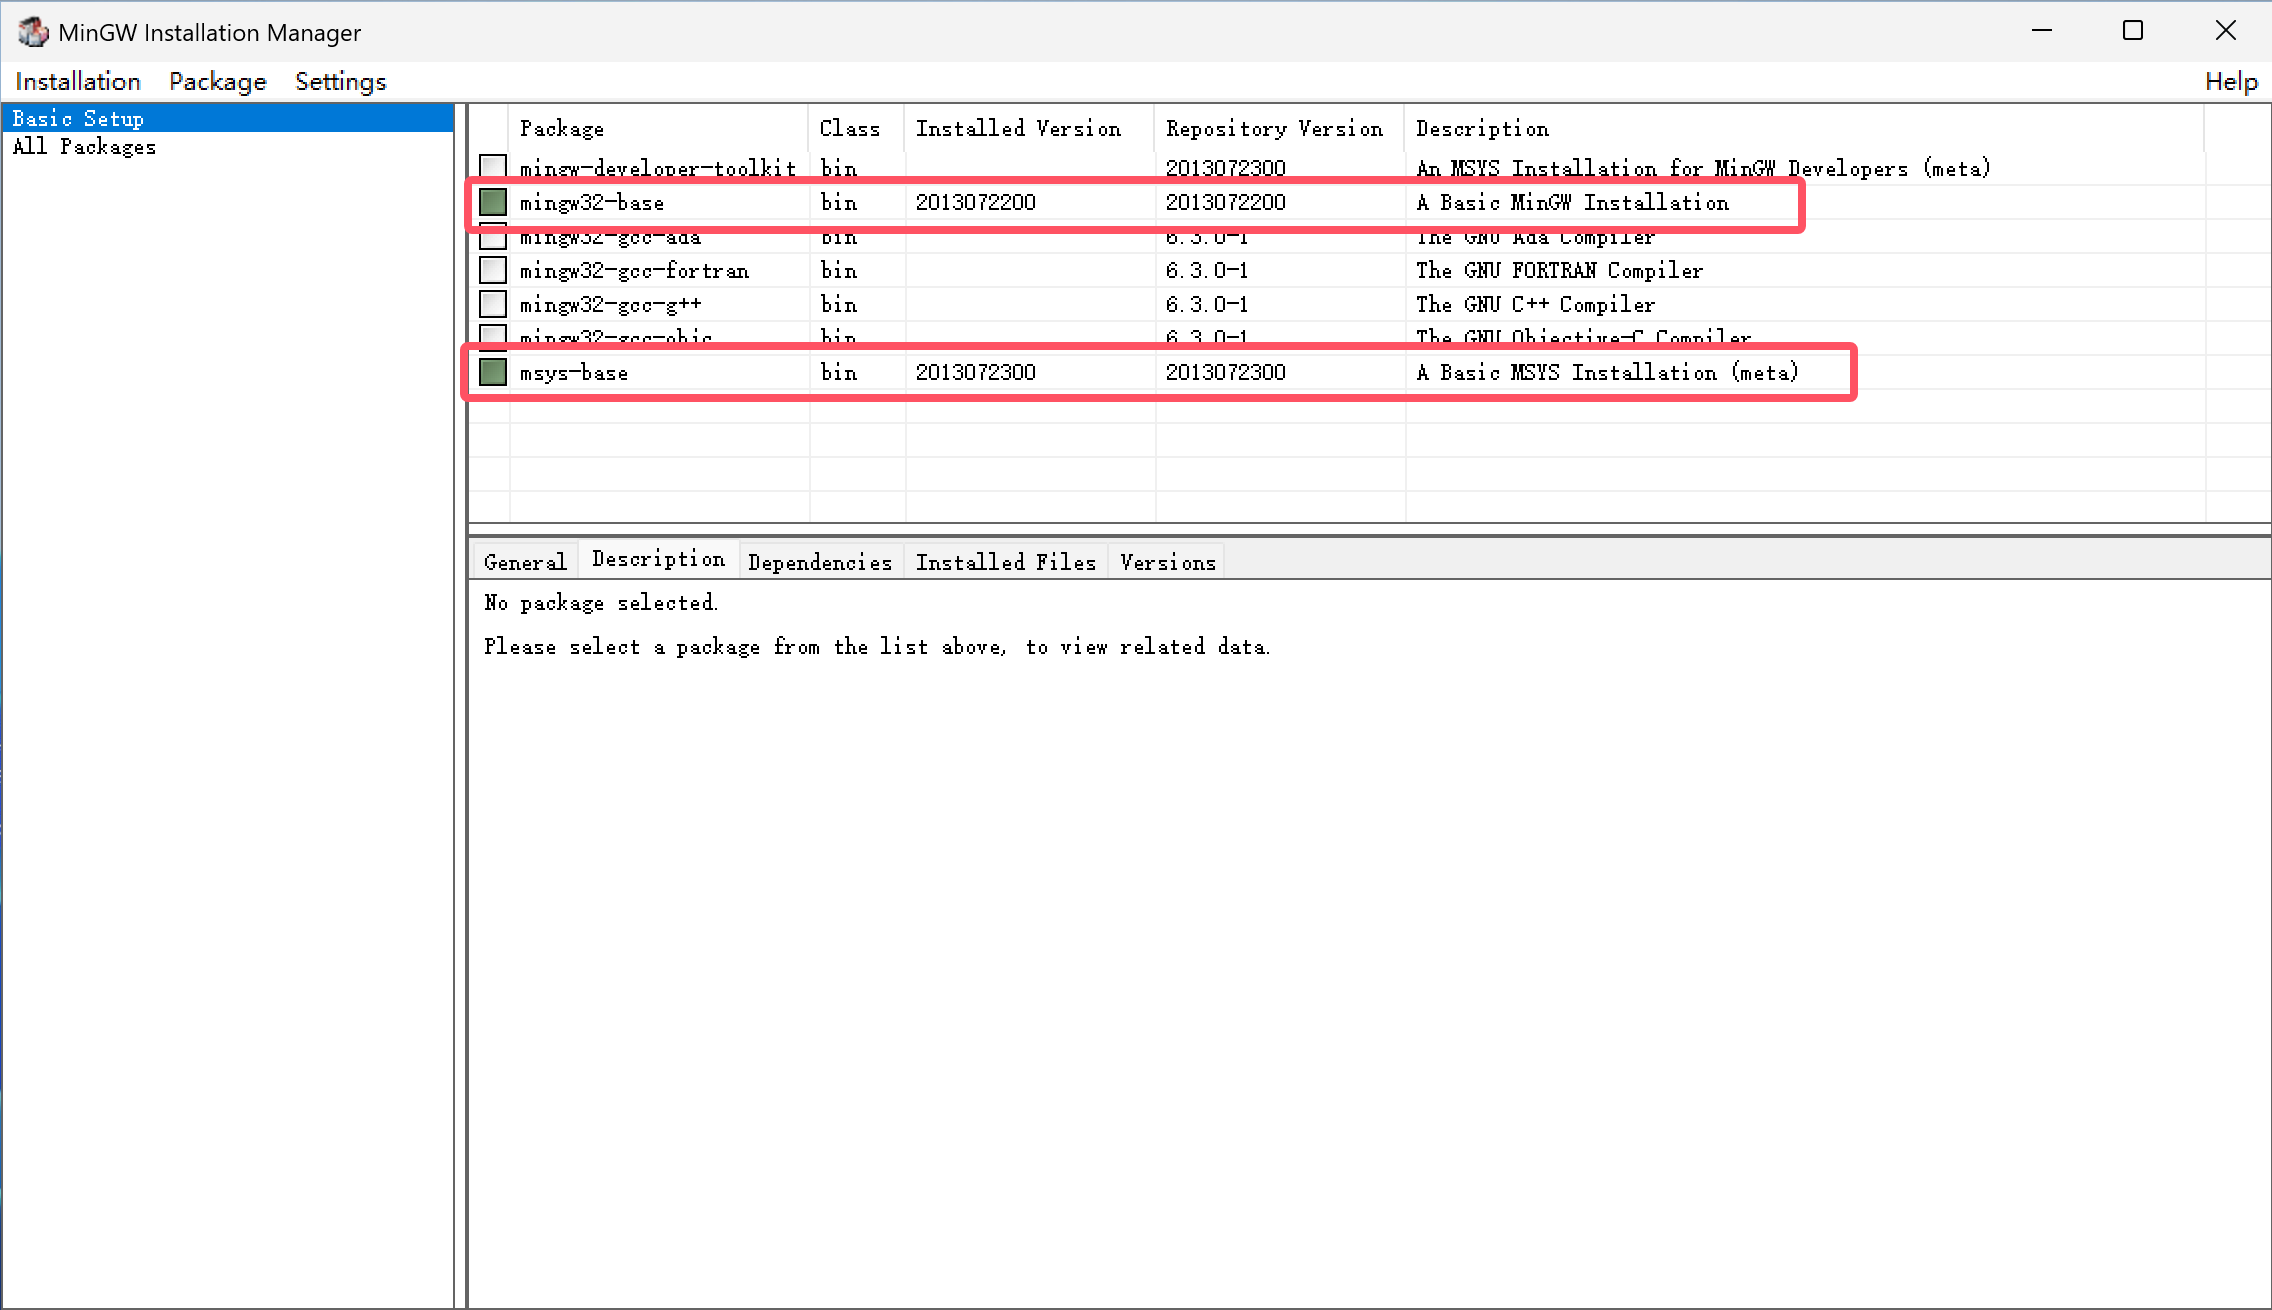
下载安装完成之后,打开软件,界面如下:
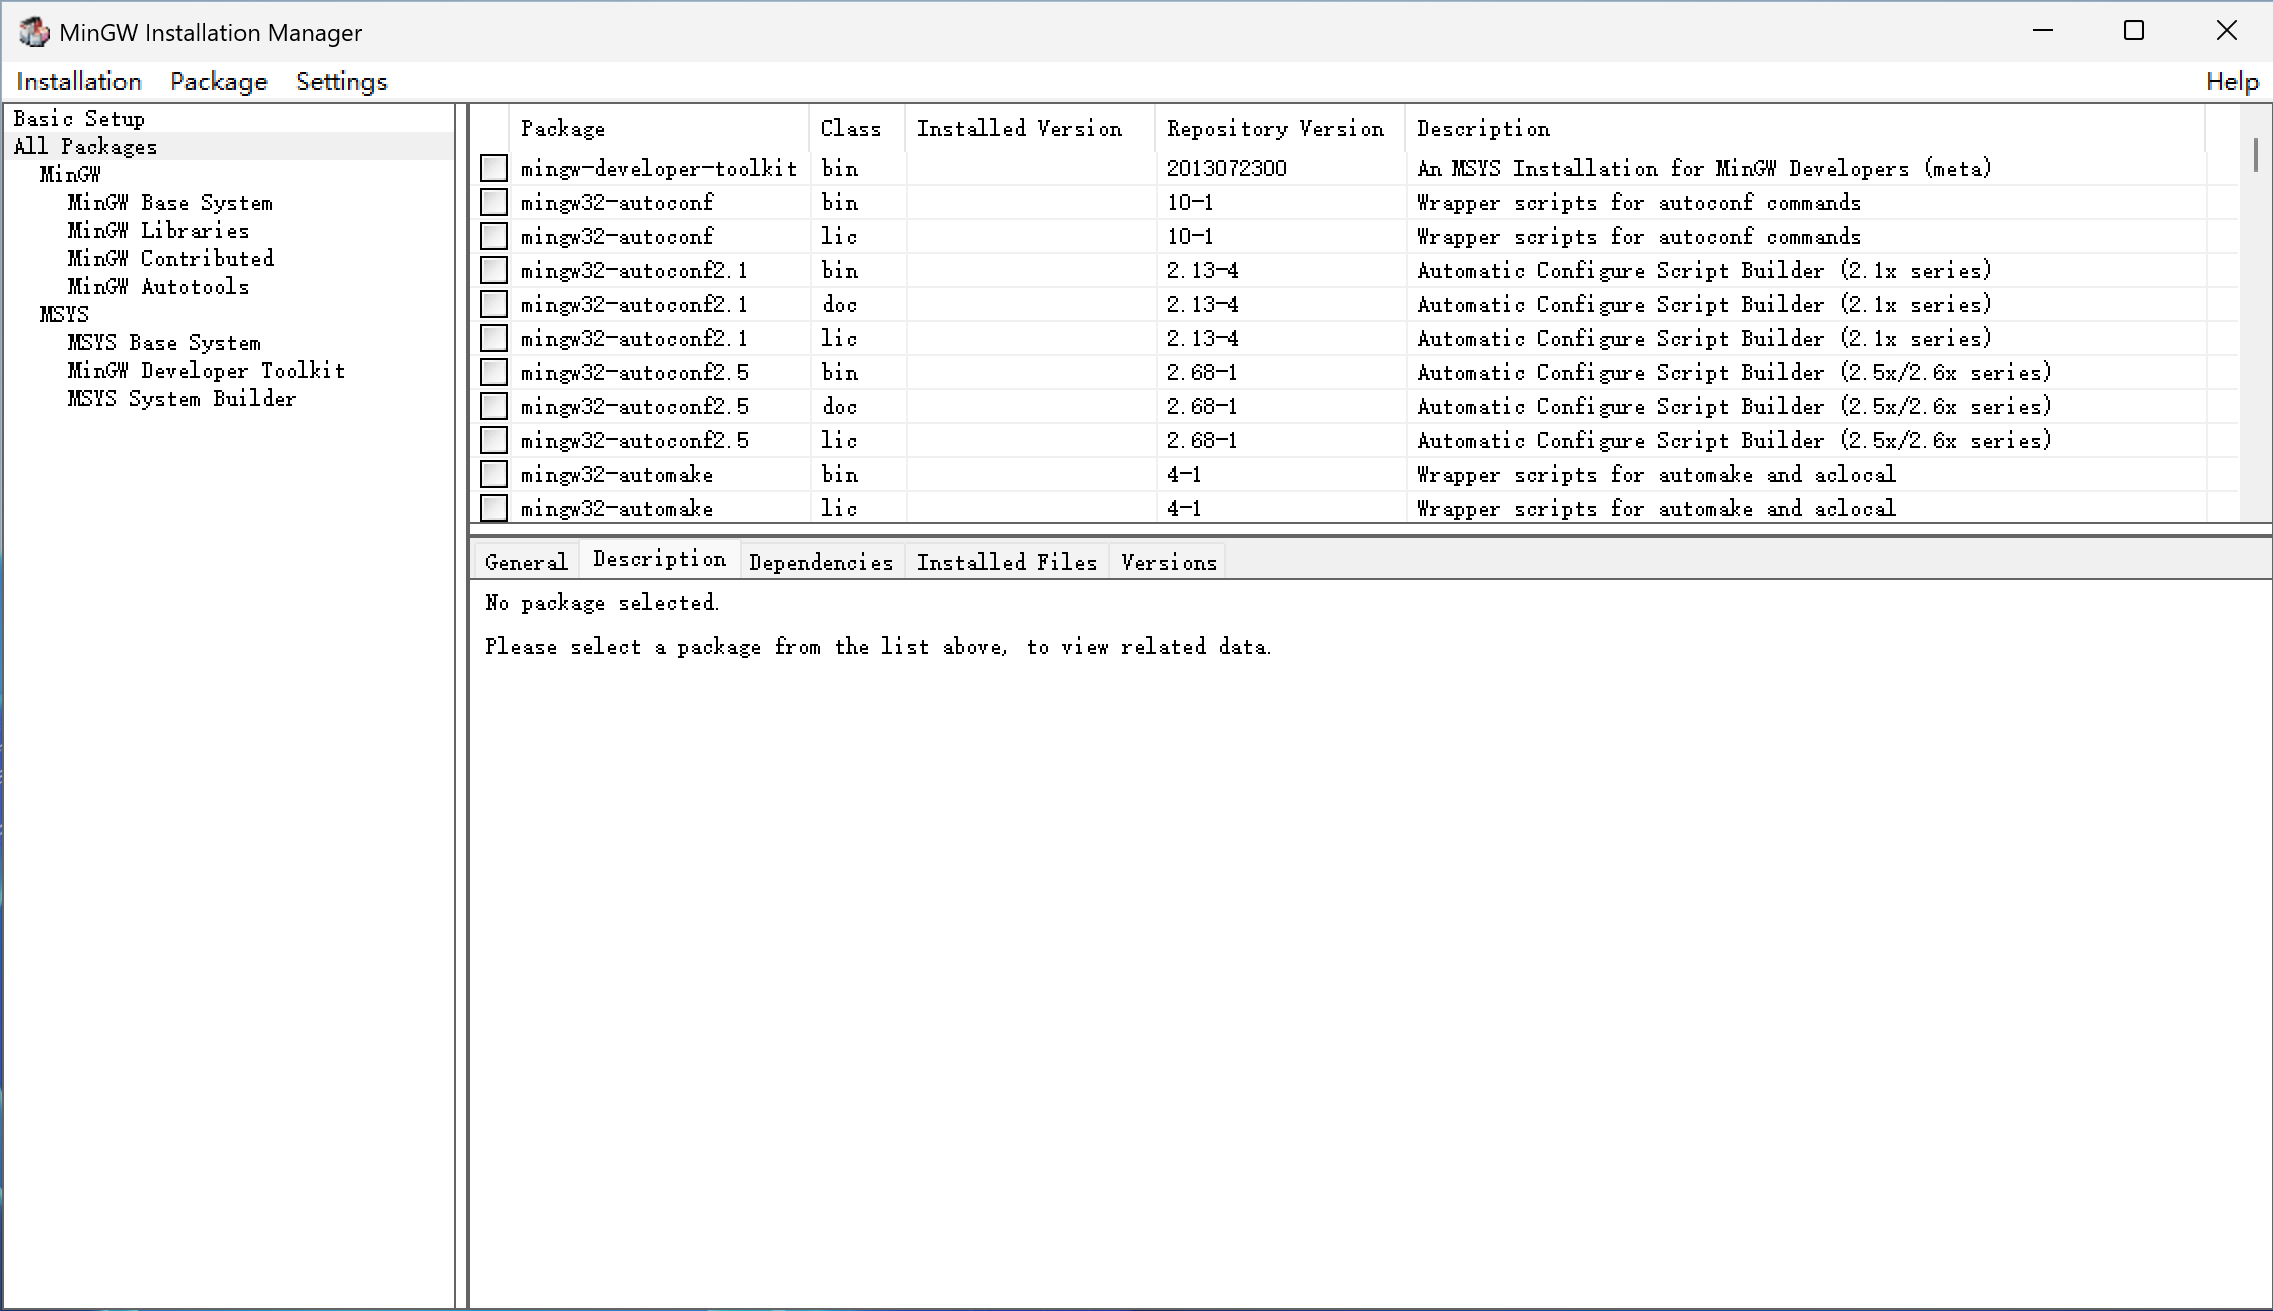
左侧菜单栏选择“Basic Setup”,然后勾选 “mingw32-base”和“msys-base”
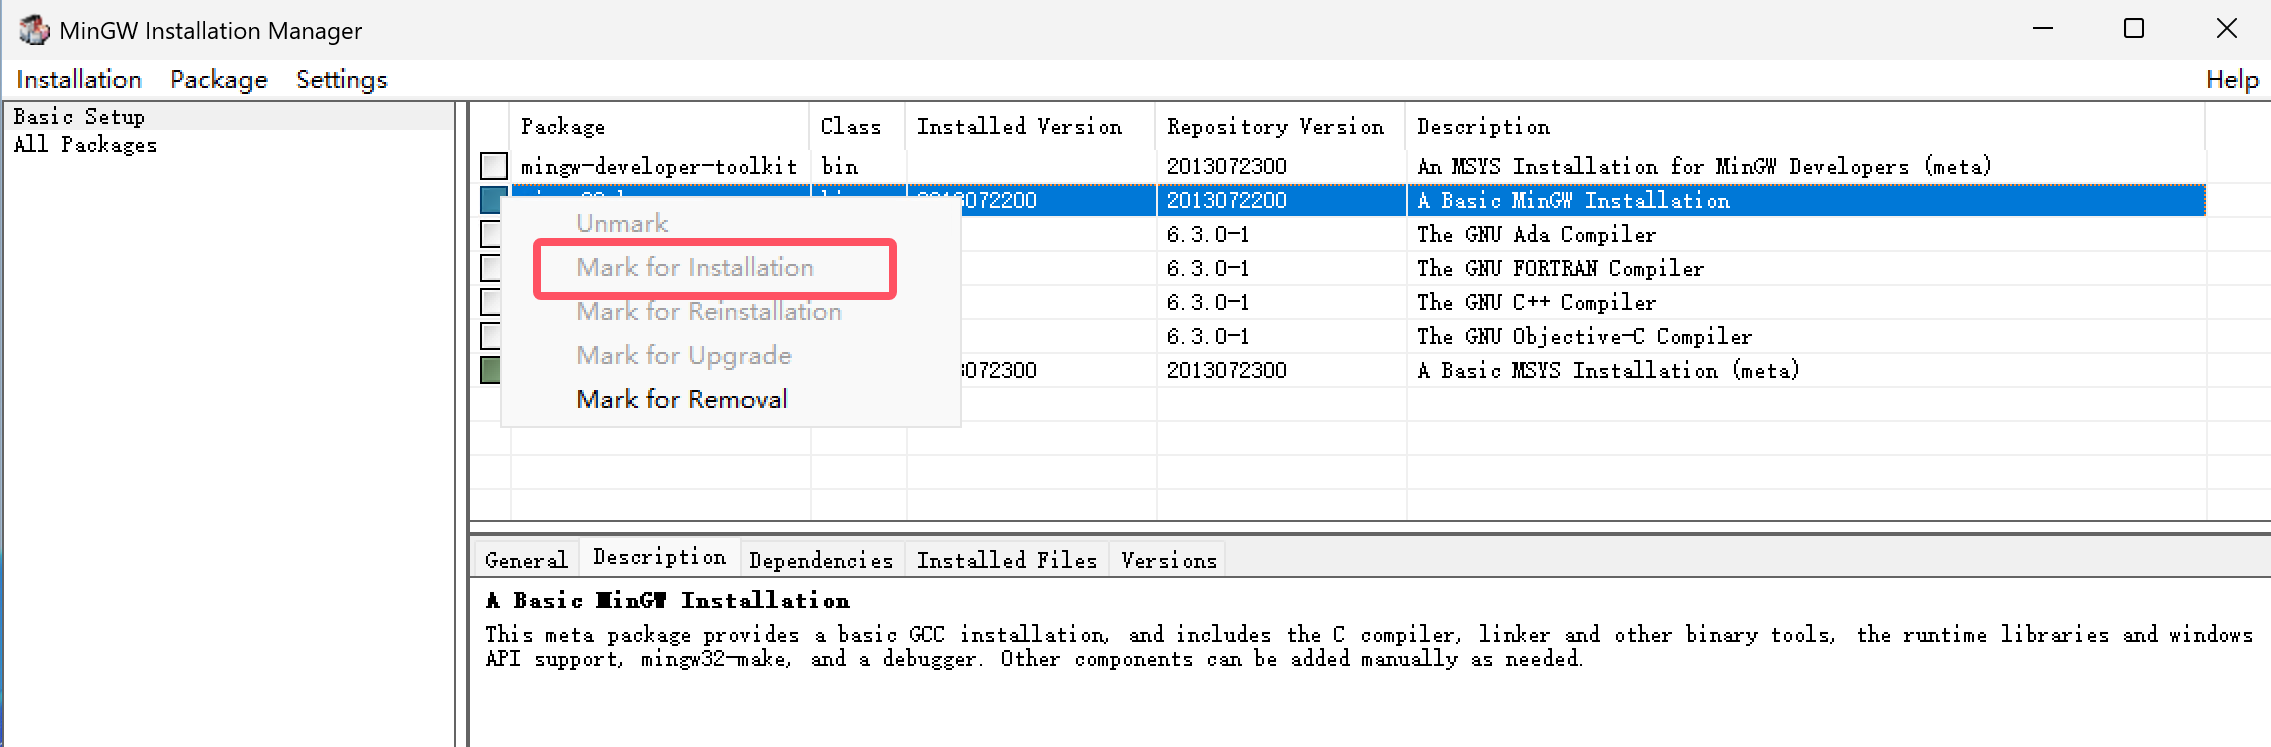
在前面的复选框点击之后,选择“Mark for installation”,这里因为我已经安装过,所以选项是灰色不可选的状态
正确选择之后,效果如图①所示,会有一个箭头,然后点击左上角的“Installation”,再在二级菜单中选择“Apply Changes”,这个时候就会弹出一个窗口,正在下载相关的组件
由于资源位于国外服务器,所以下载速度会比较慢,可以挂在后台下载或者自行使用代理
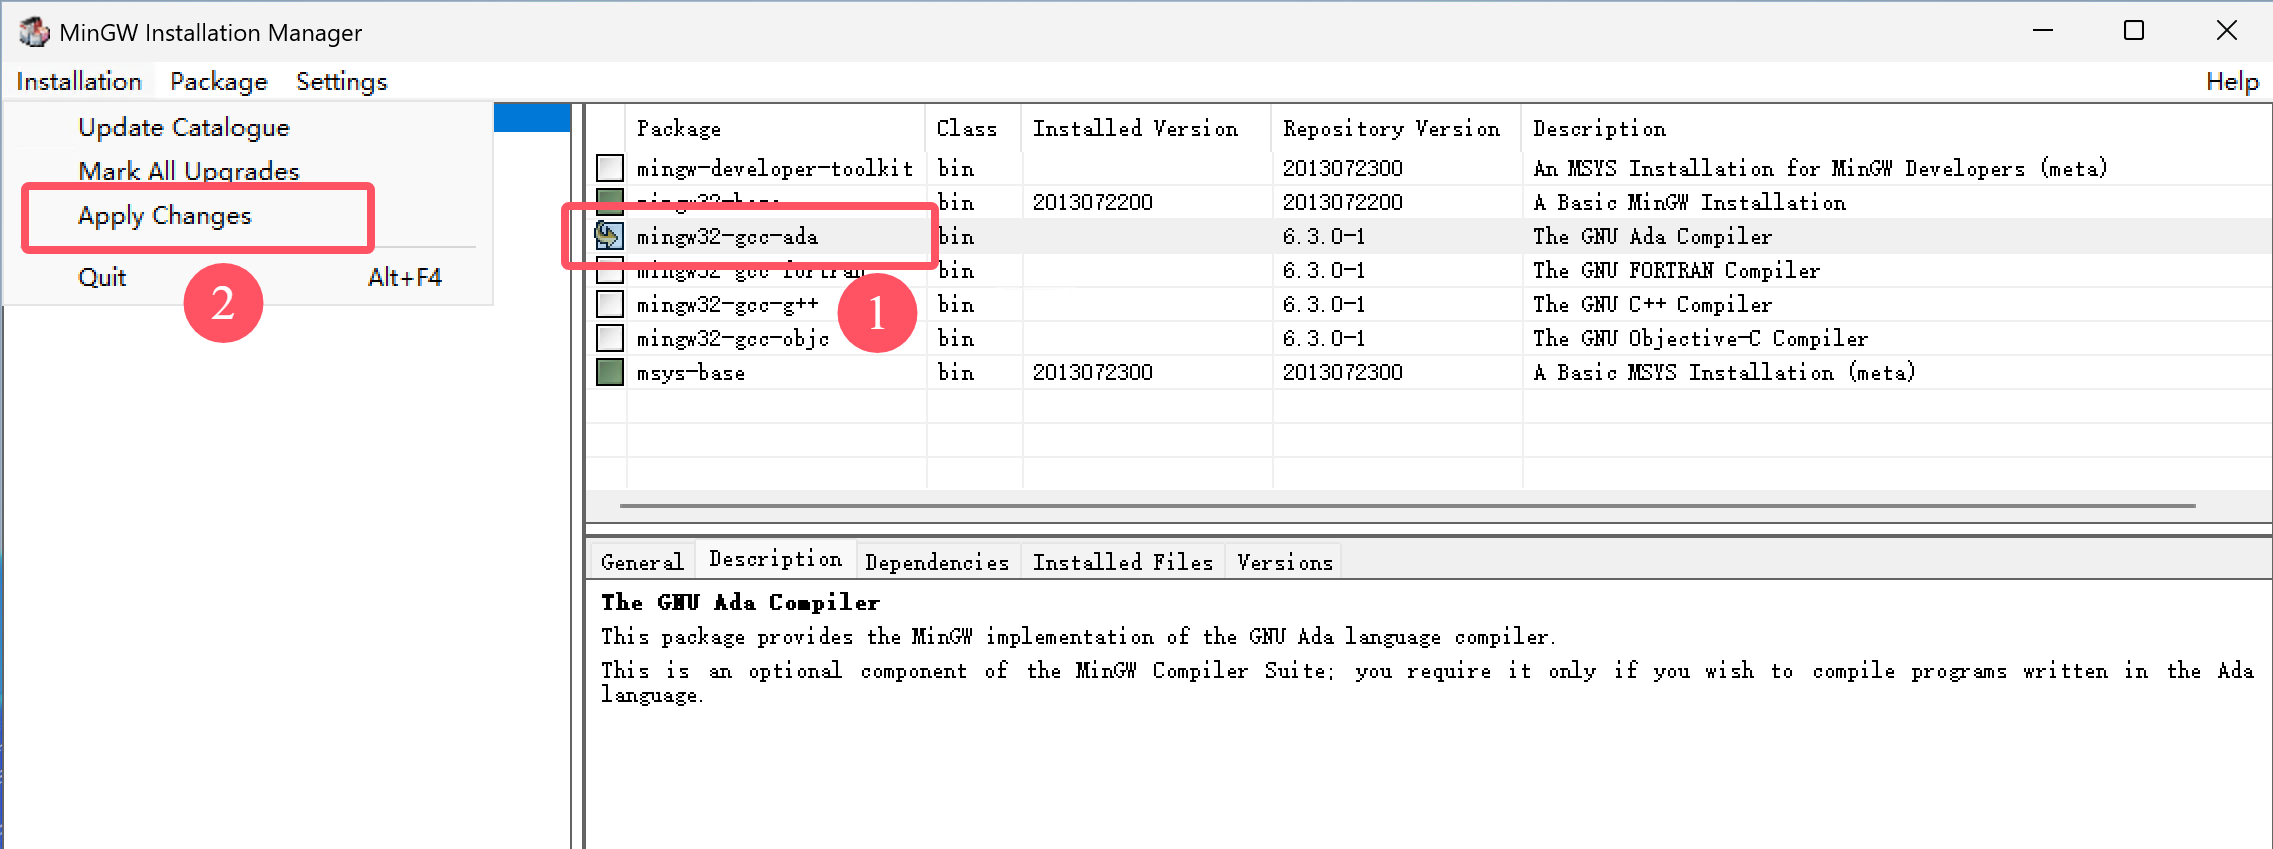
下载安装完这两个组件之后就可以关闭窗口了
三、安装Strawberry
后续配置:需要将安装路径中的 /c/bin、/c/perl/bin、/c/site/bin 加入到PATH环境变量里面
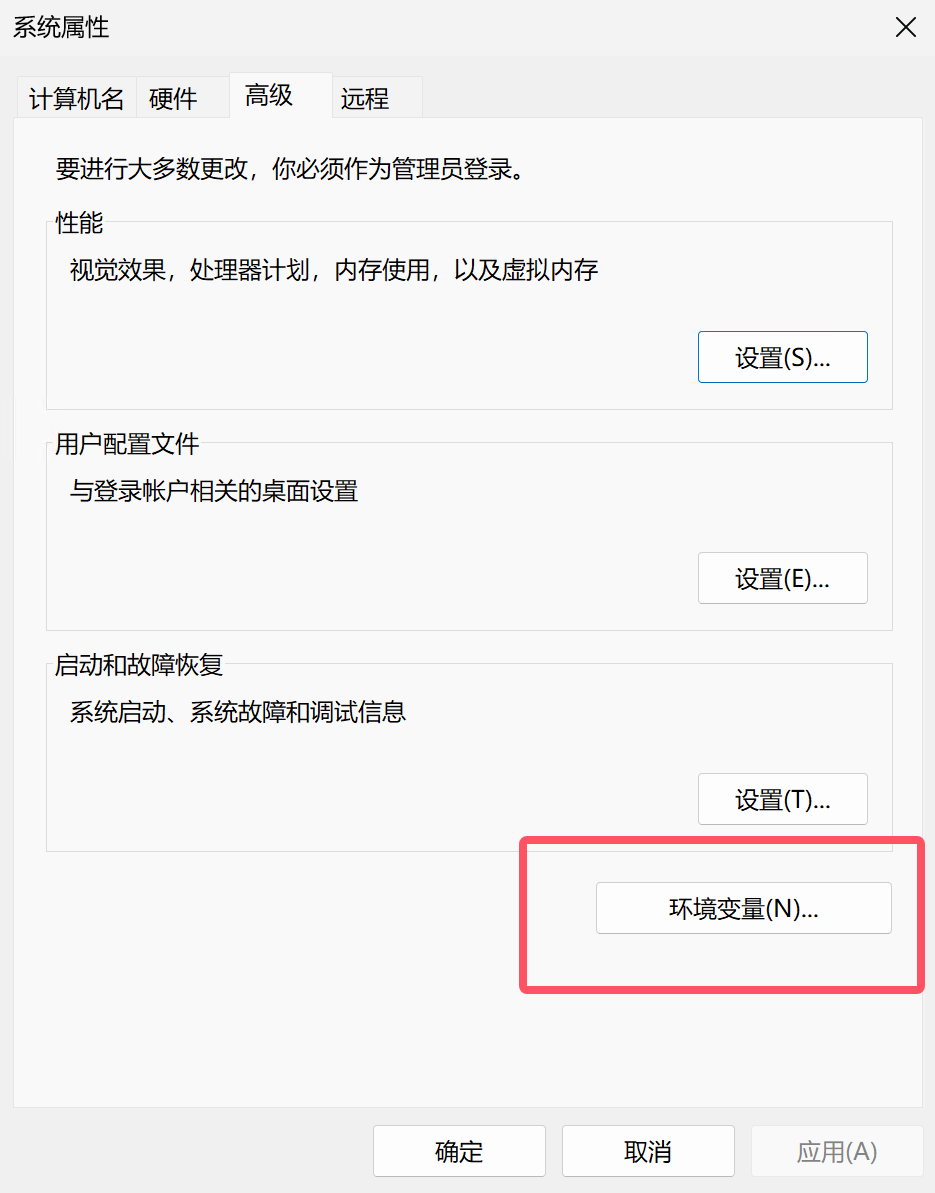
正常情况下,安装之后就会自动添加到系统变量,可以按照下方图片所示步骤检查是否添加到环境变量


四、安装 Mercurial 地址
把bin目录加入到PATH环境变量里面。不安装也可以,直接到官网下载nginx源码解压即可
这里我是直接下载了nginx的源码,没有安装Mercurial,这里放一下我编译用到的nginx1.24.0的源码,地址
压缩包格式是.tar.gz,所以最好用7-zip去解压,7-zip的安装步骤就不贴了
五、下载Nginx依赖库
这里的依赖版本我选的是版本比较新的,亲测nginx-1.24.0版本是可以编译通过的
openssl-1.1.1j (官方) 网盘 地址
pcre这个依赖需要下载pcre这个版本的,不要下载pcre2的版本,否则编译可能无法通过
参考了这里的教程,好像pcre2的版本也是可以编译通过的,具体可以自己尝试,至少pcre版本没有问题!
zlib-1.3.1 (官方) 网盘 地址
编译gd图形库
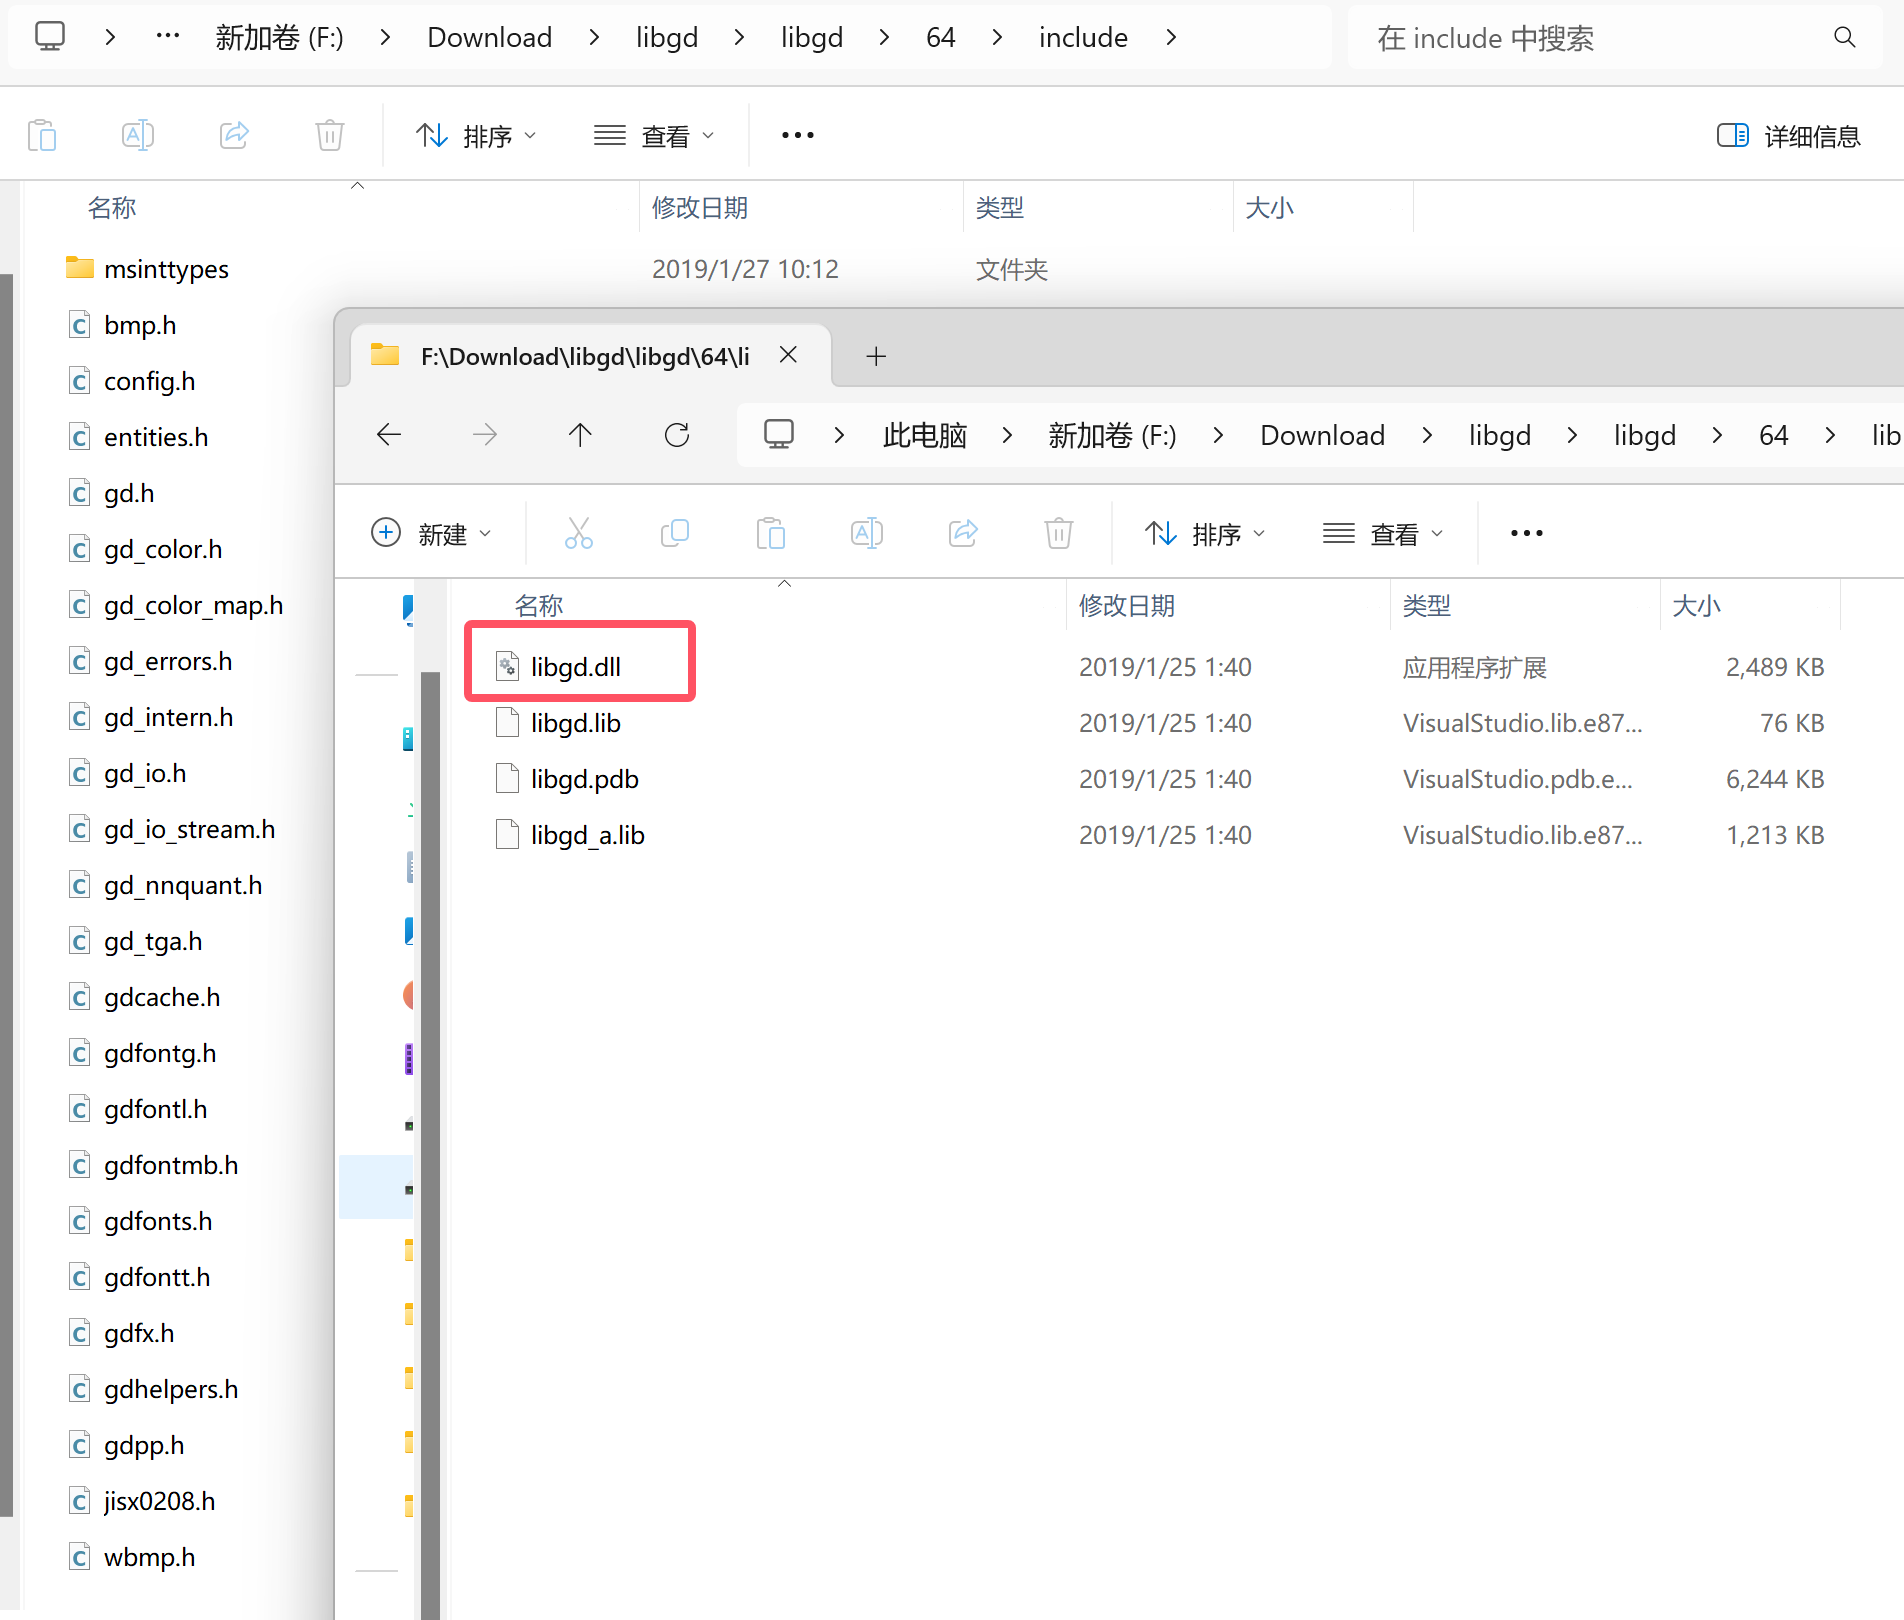
通过libgd的源码编译成.dll动态链接库,大佬的教程不是很详细,也是参照官方给出的Windows下编译libgd的教程,我这里是没有自己去编译,直接下载了大佬编译好的libgd.dll文件,这里给一下地址
如果愿意折腾可以参考大佬的教程和官方的教程自己尝试去编译一下!!!
后期会尝试一下编译,如果成功了,会更新文章……..
编译好的库文件如下图所示:
编译Nginx
一、新建目录、添加依赖
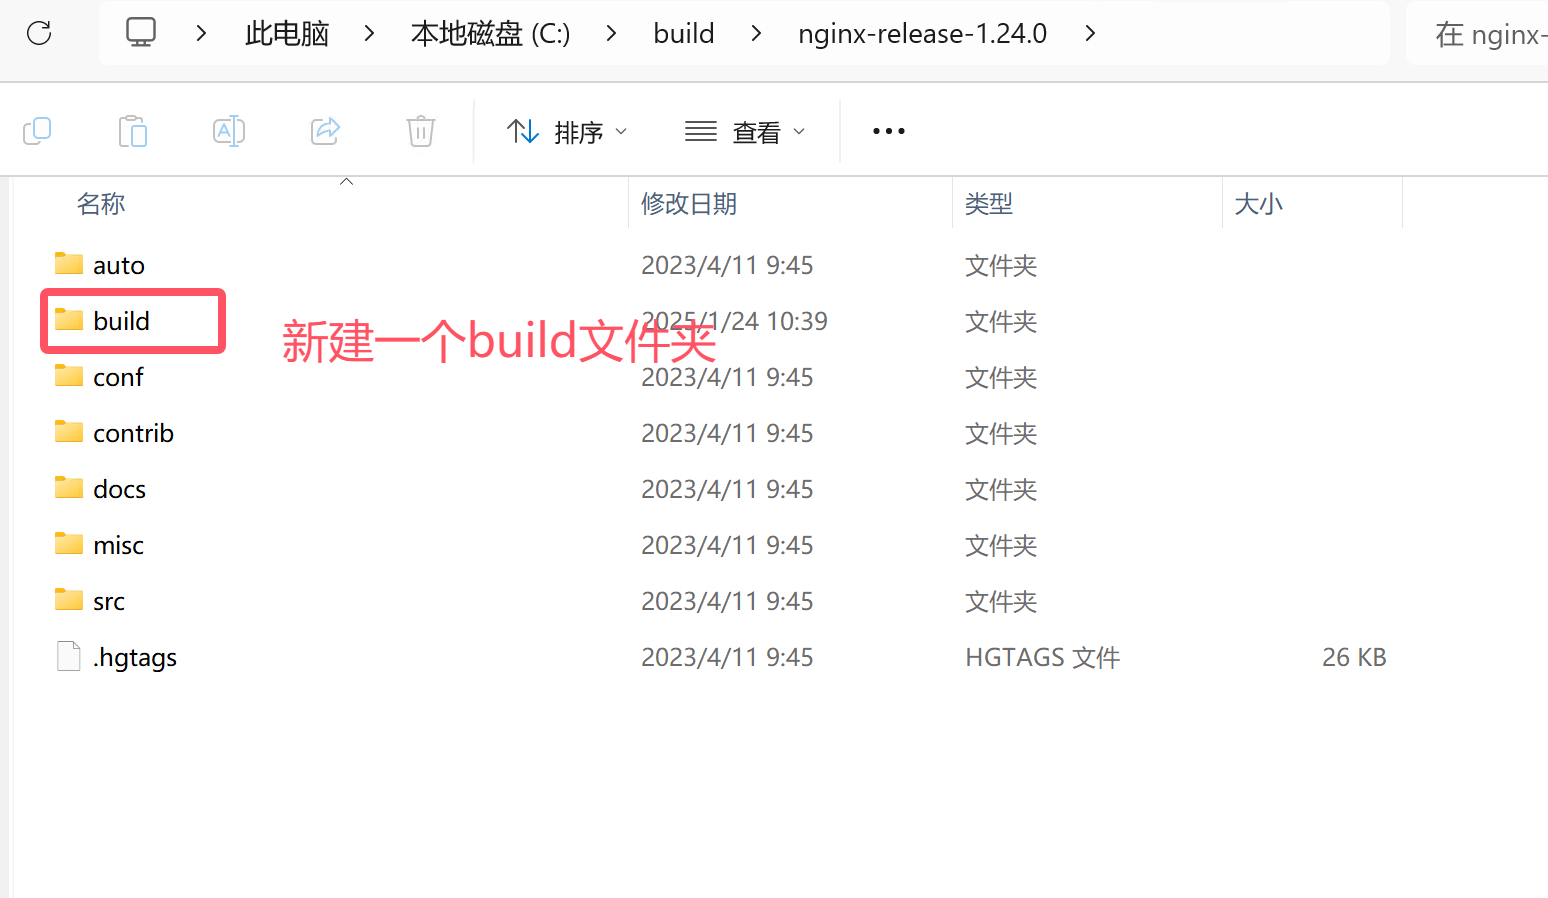
在nginx源码根目录中新建“build”目录,再在“build”目录中新建“lib”目录

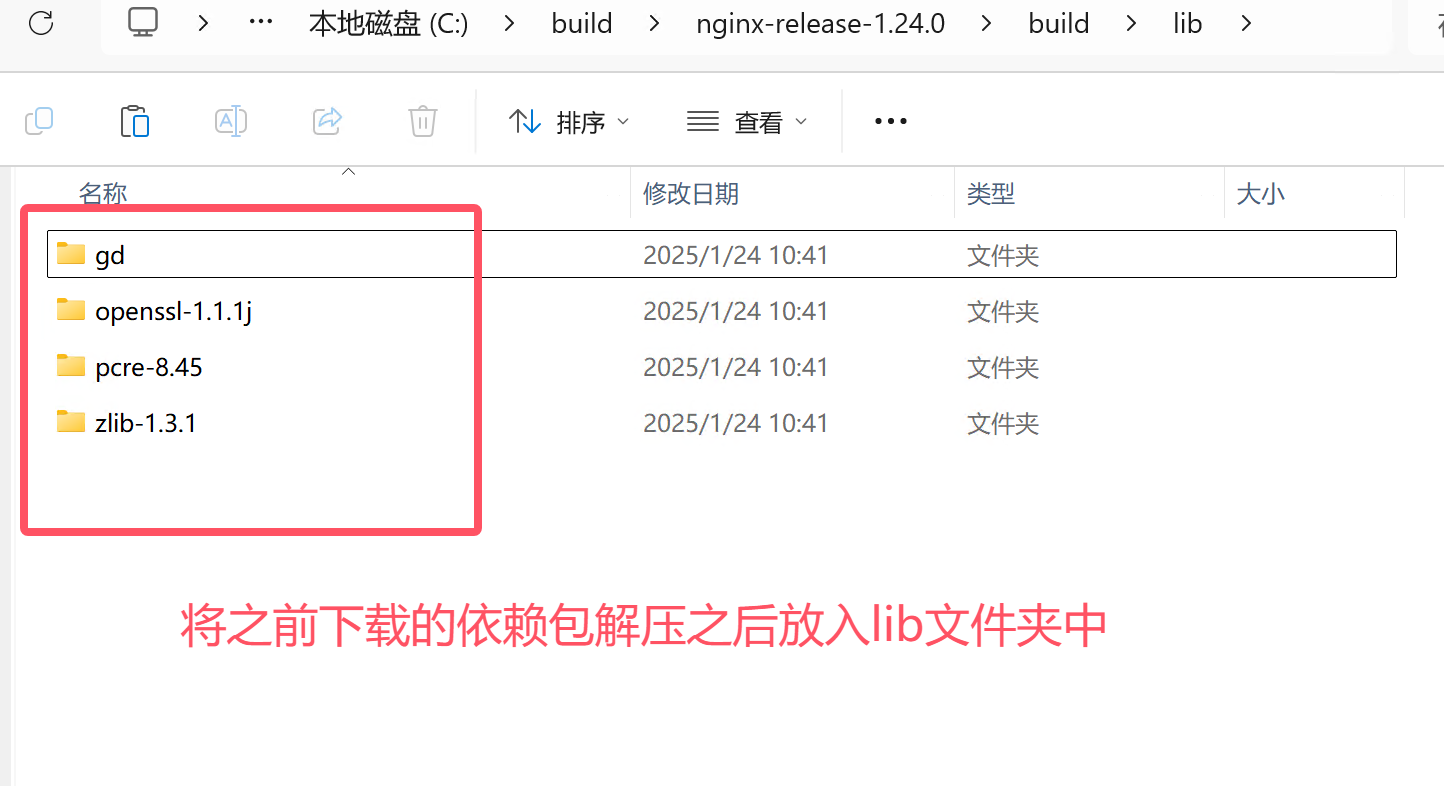
将之前下载的三个依赖、一个编译好的模块放入
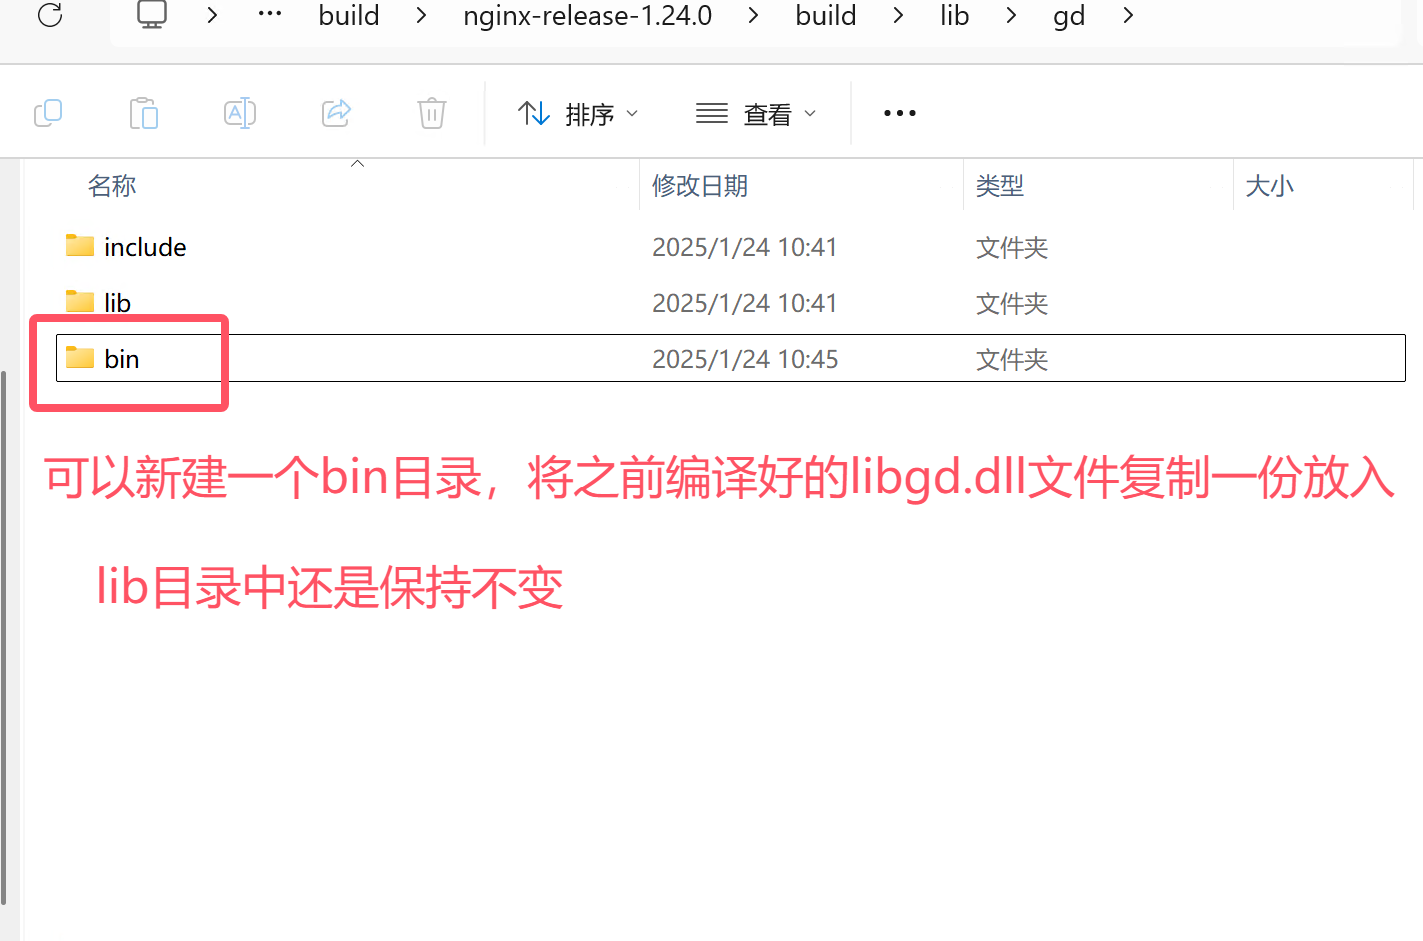
对于放入的gd模块的说明:
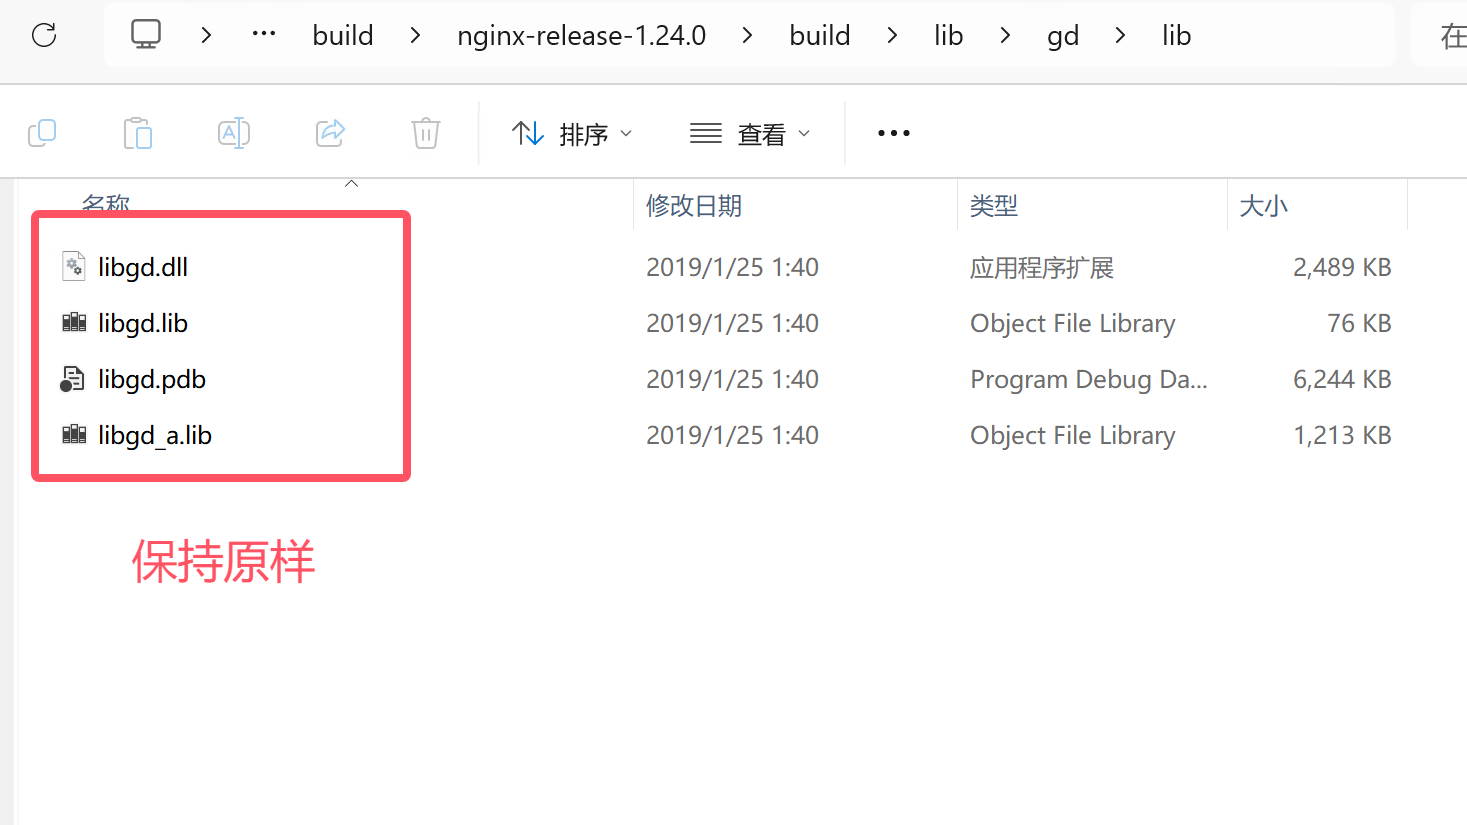
新建一个“bin”目录,将“lib”目录中的libgd.dll文件复制一份放入“bin”目录中,原本“lib”目录中的不需要删除
二、参数配置
因为是在64位的系统上编译,所以需要选择openssl配置为64位。
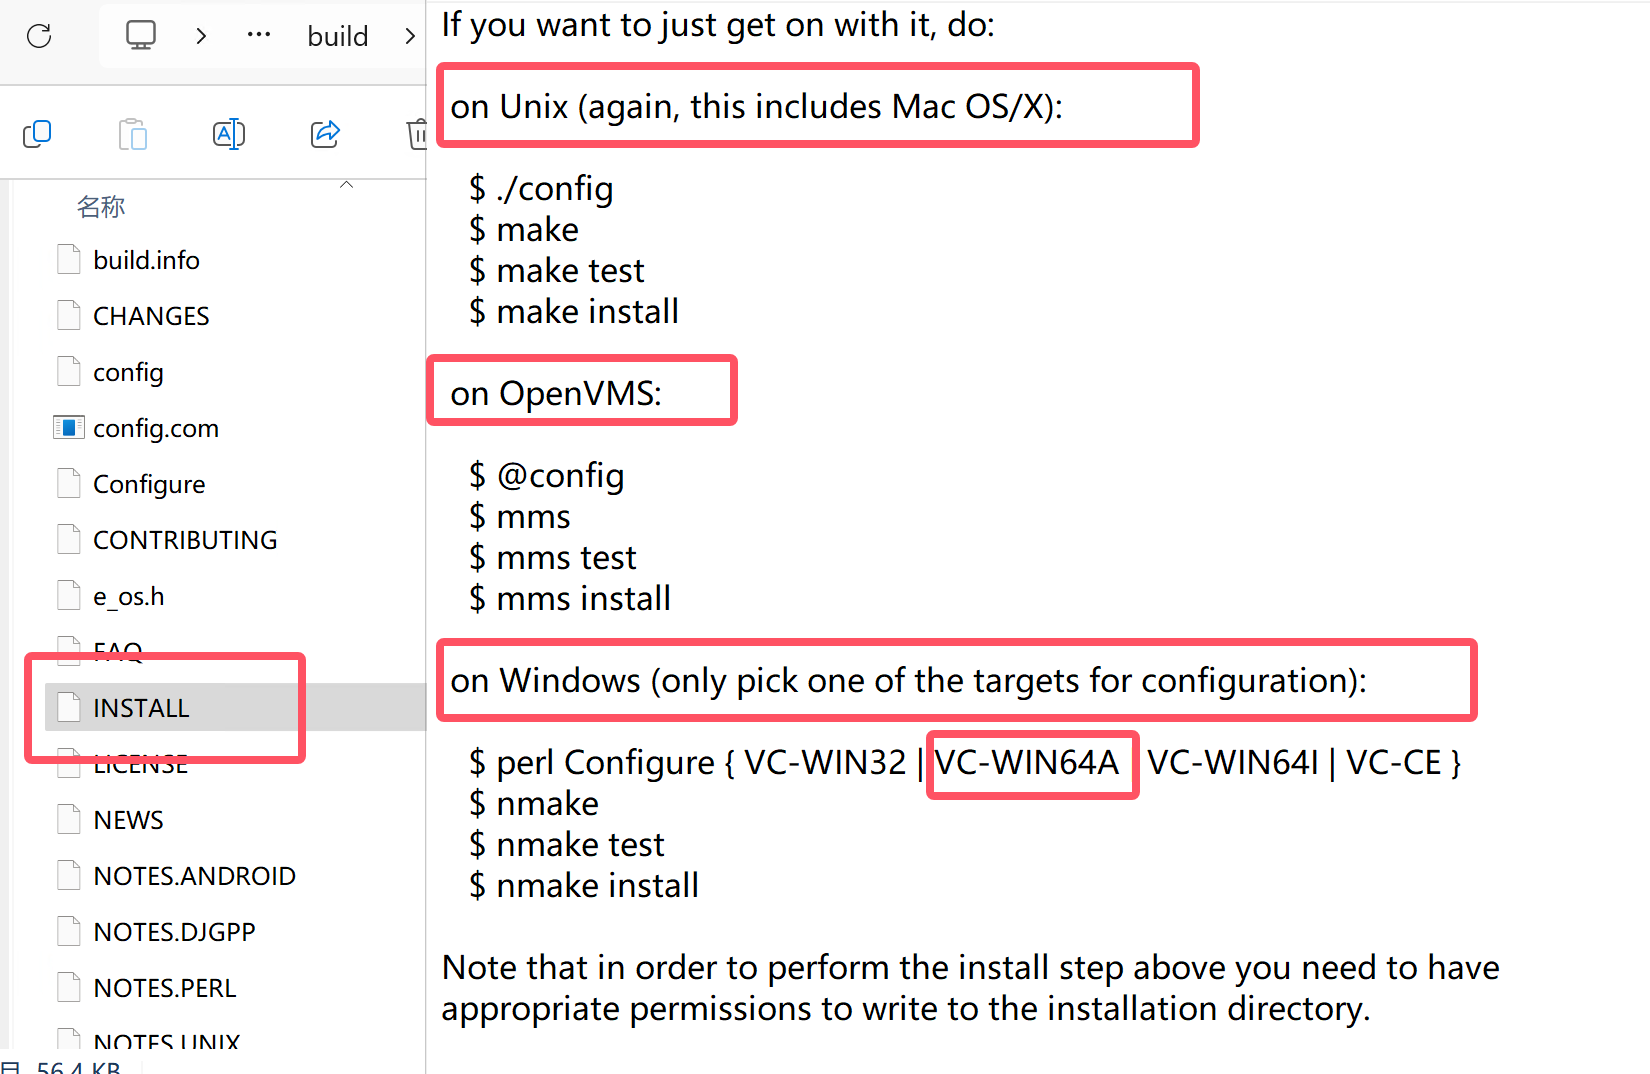
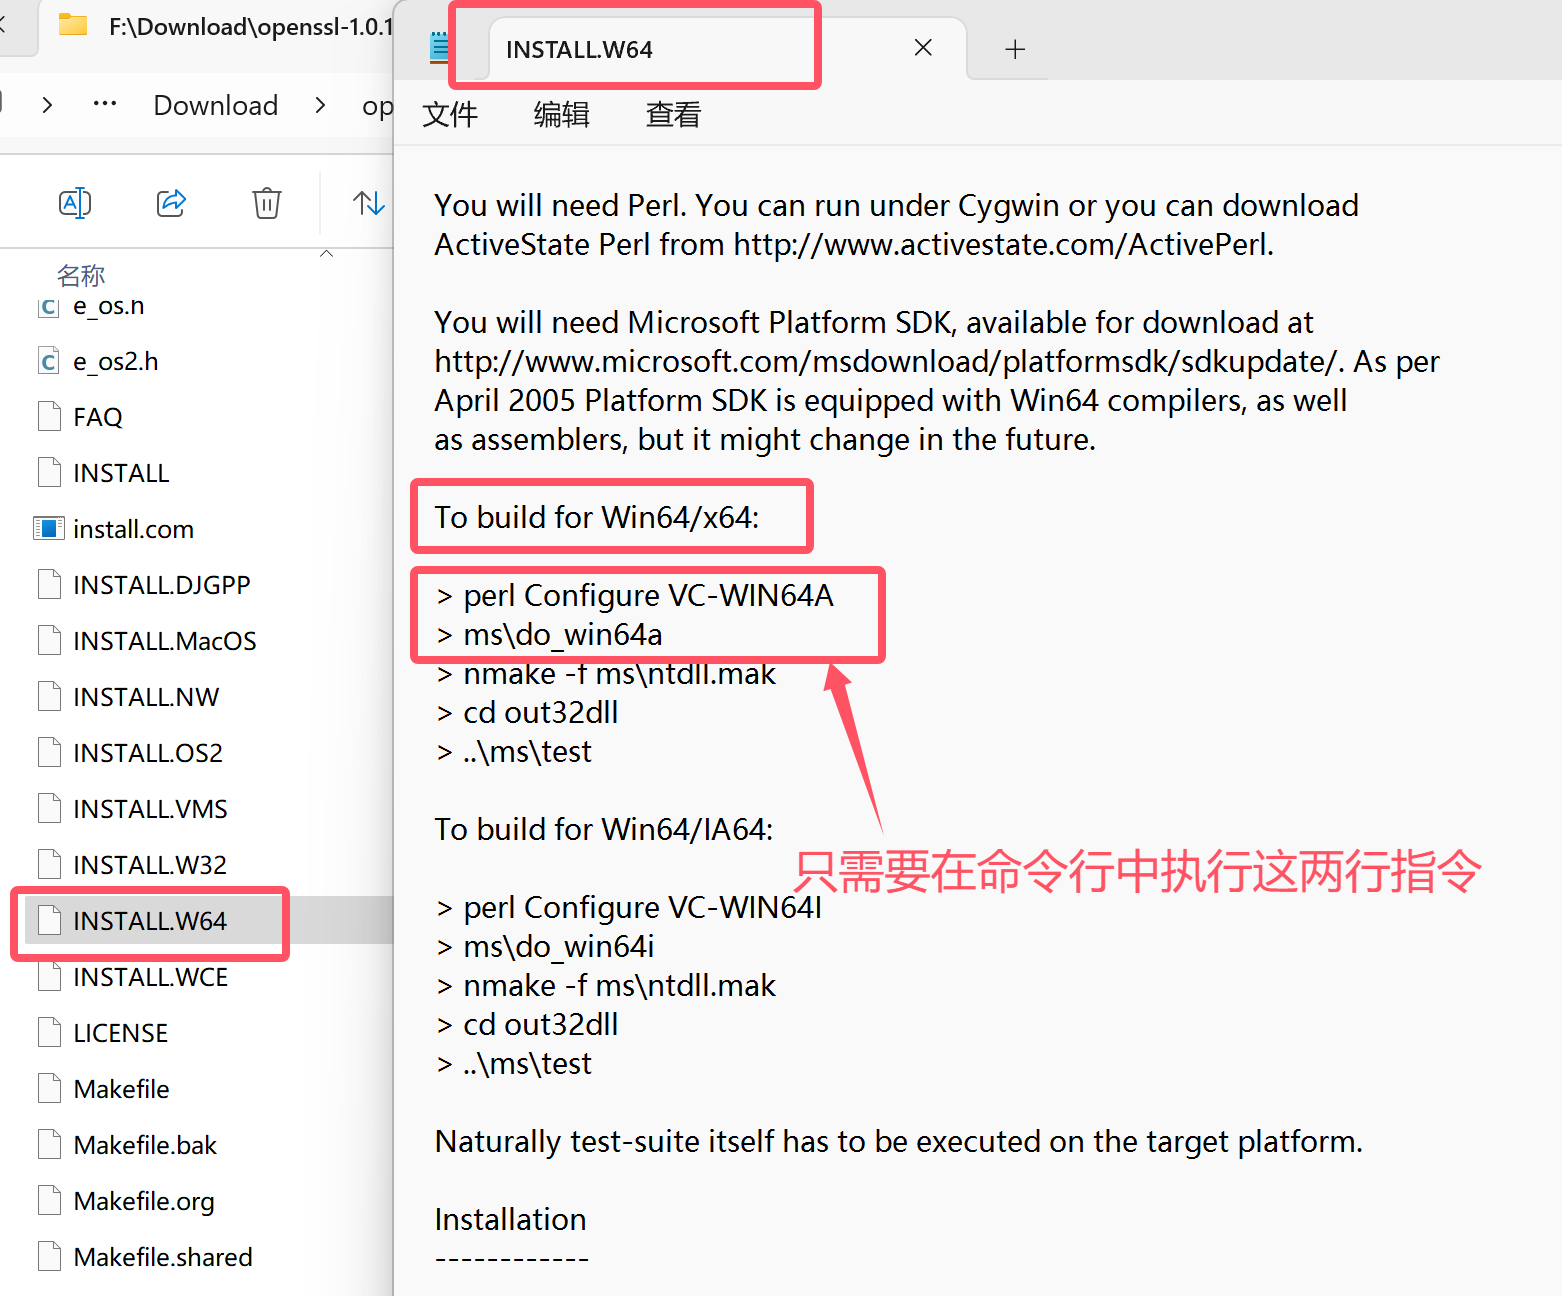
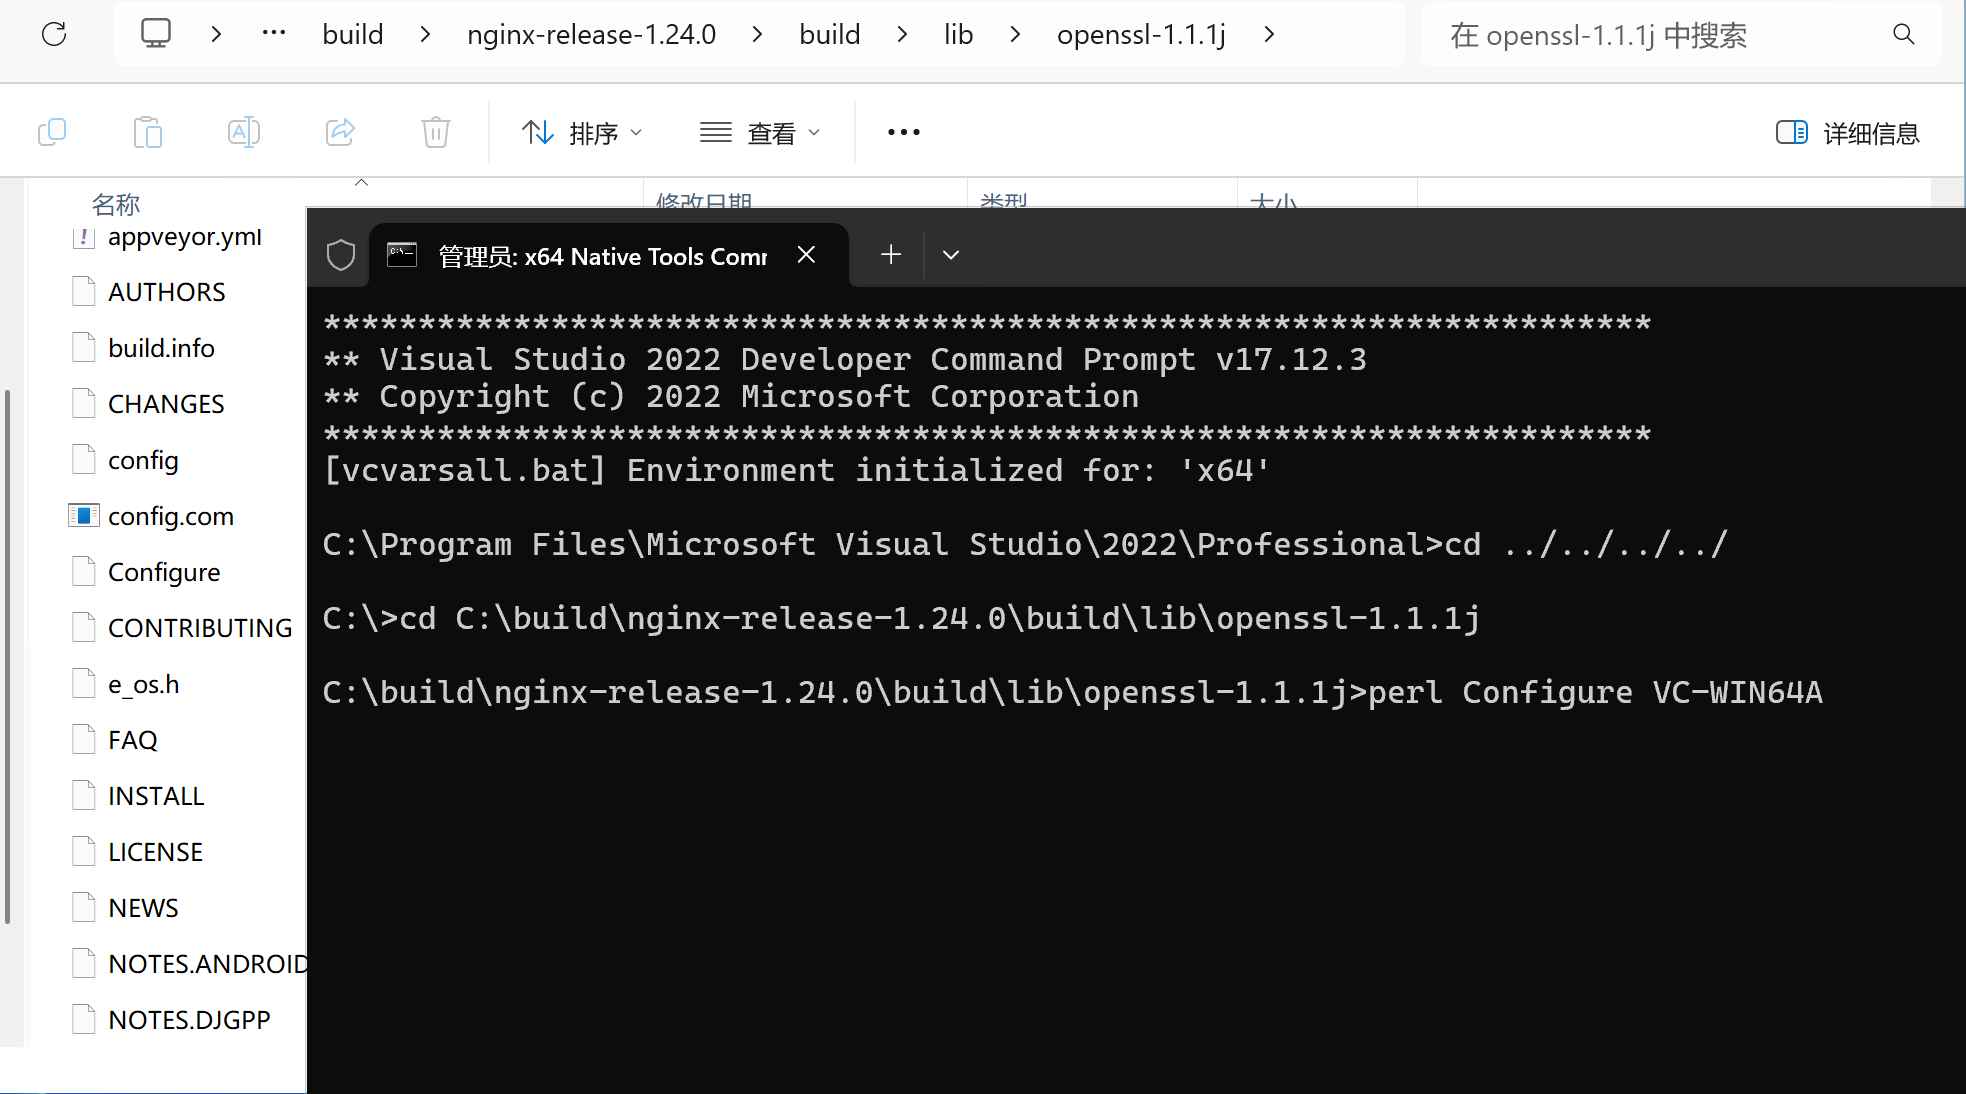
openssl-1.1.1j版本的根目录下找到INSTALL文件,用文本编辑器打开它,可以看到在各个系统上使用时需要运行的配置命令,我们这里是64位,所以需要在x64 Native Tools Command Prompt for VS 2022 命令行中切换到openssl的根目录,然后运行 perl Configure VC-WIN64A
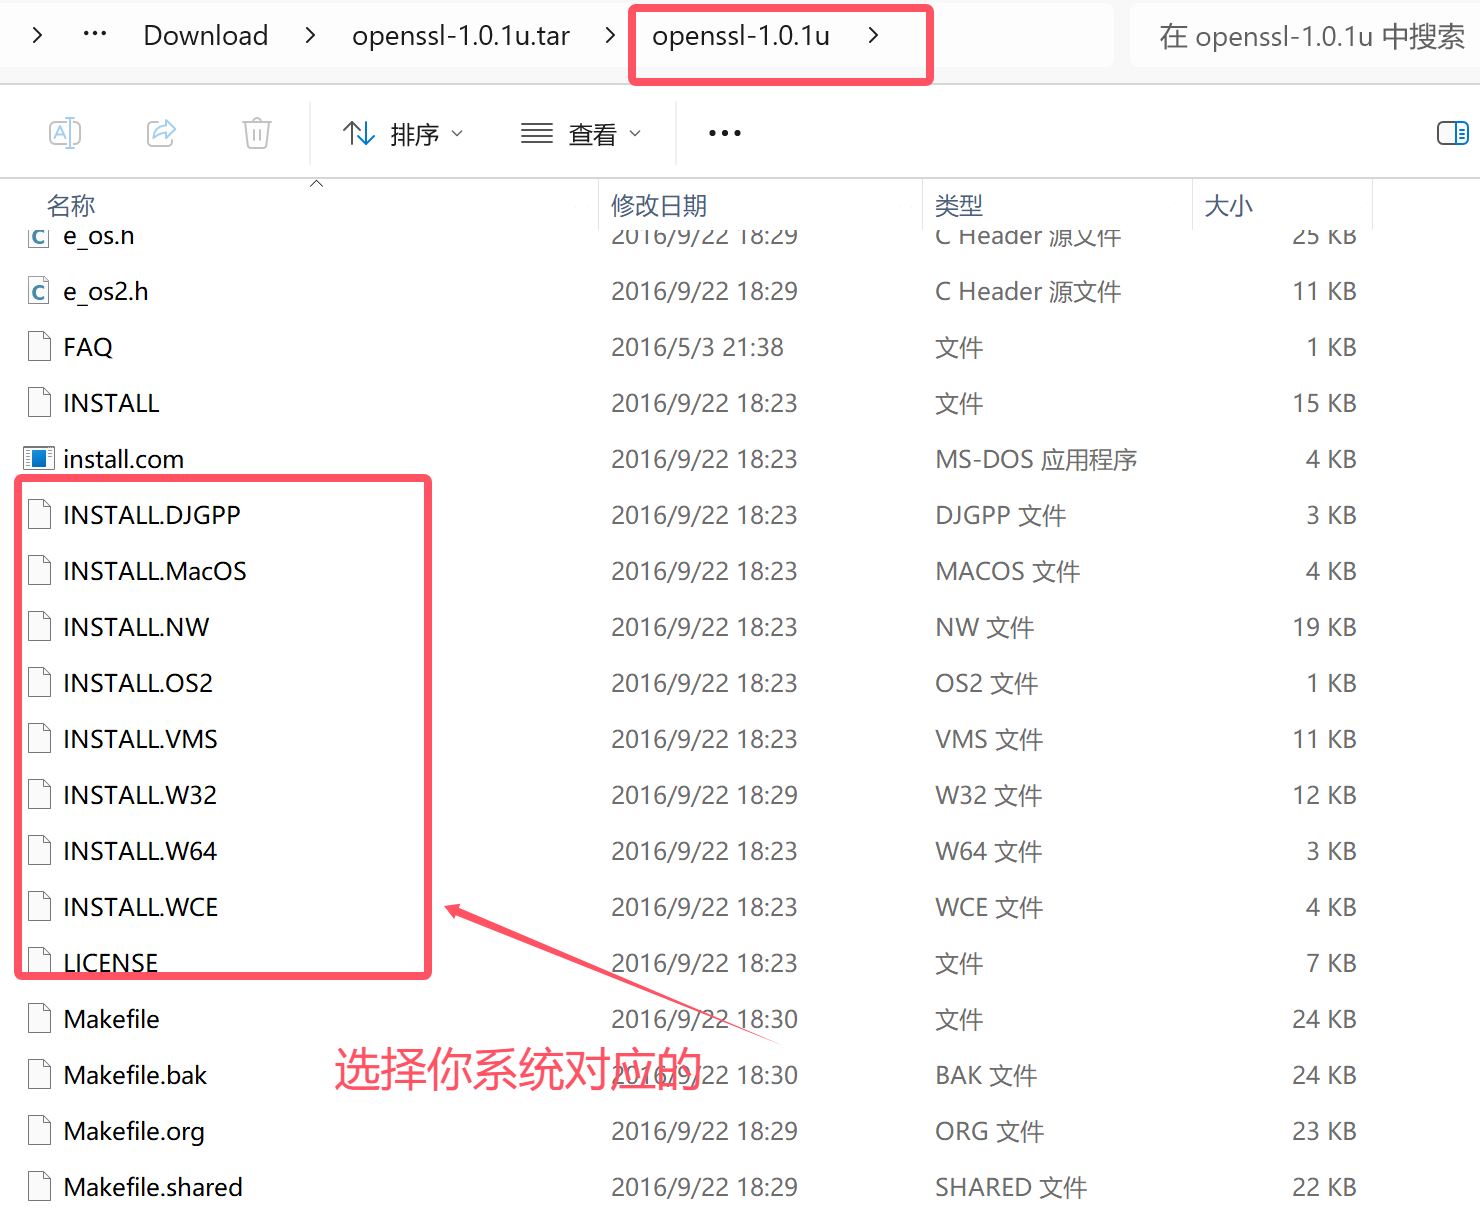
如果你选择使用的openssl是比较旧的版本,根目录的结构可能是这样的,可以按照图所示步骤查看需要运行的配置指令
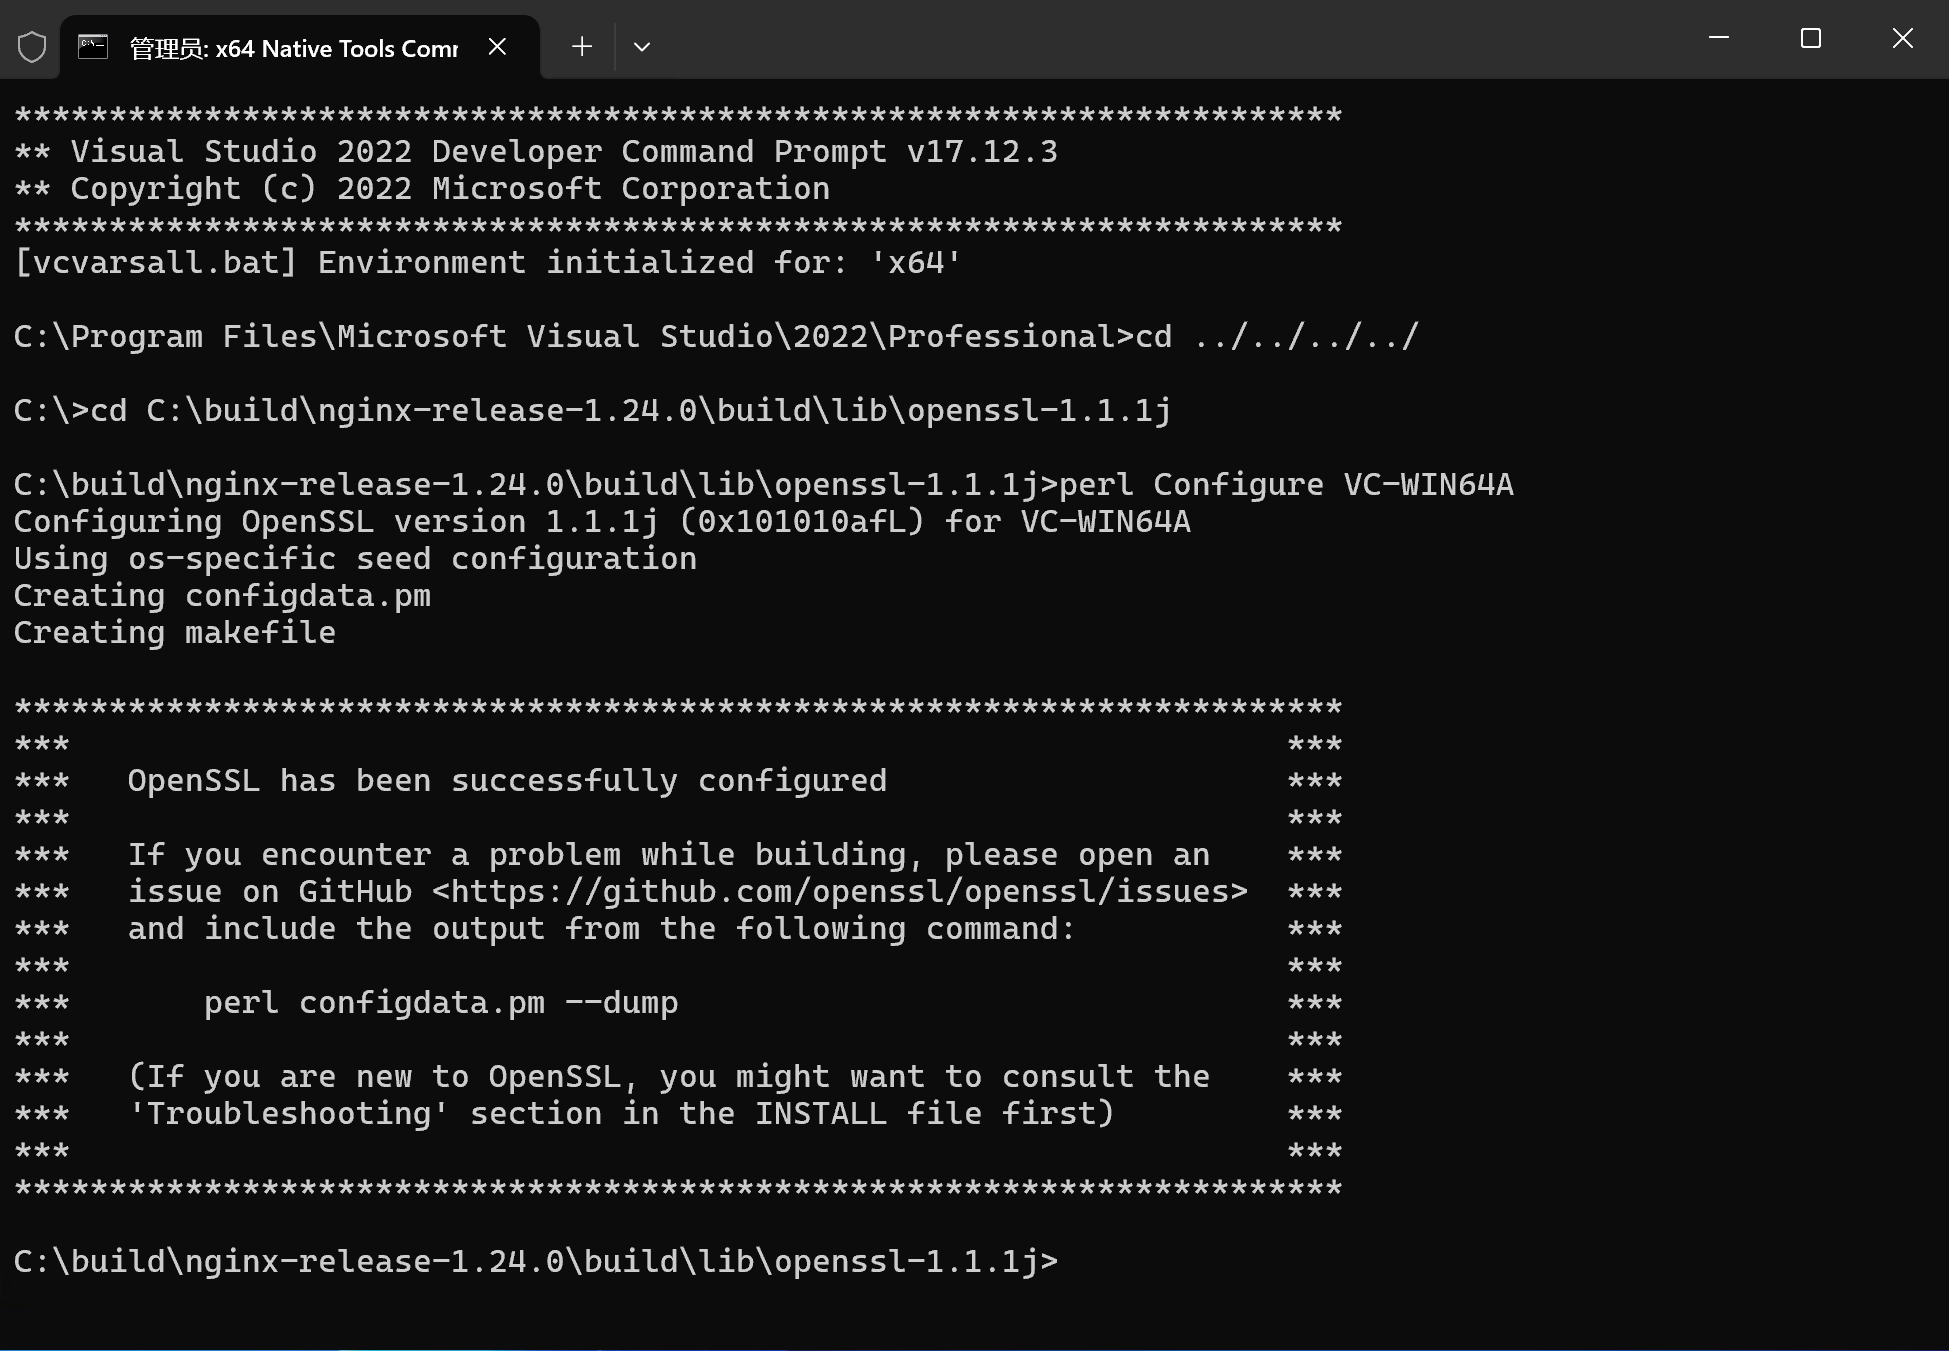
以管理员身份打开x64 Native Tools Command Prompt for VS 2022 命令行工具,切换到openssl的源代码根目录,然后运行相关指令,成功运行之后效果如下图所示
三、创建MakeFile文件
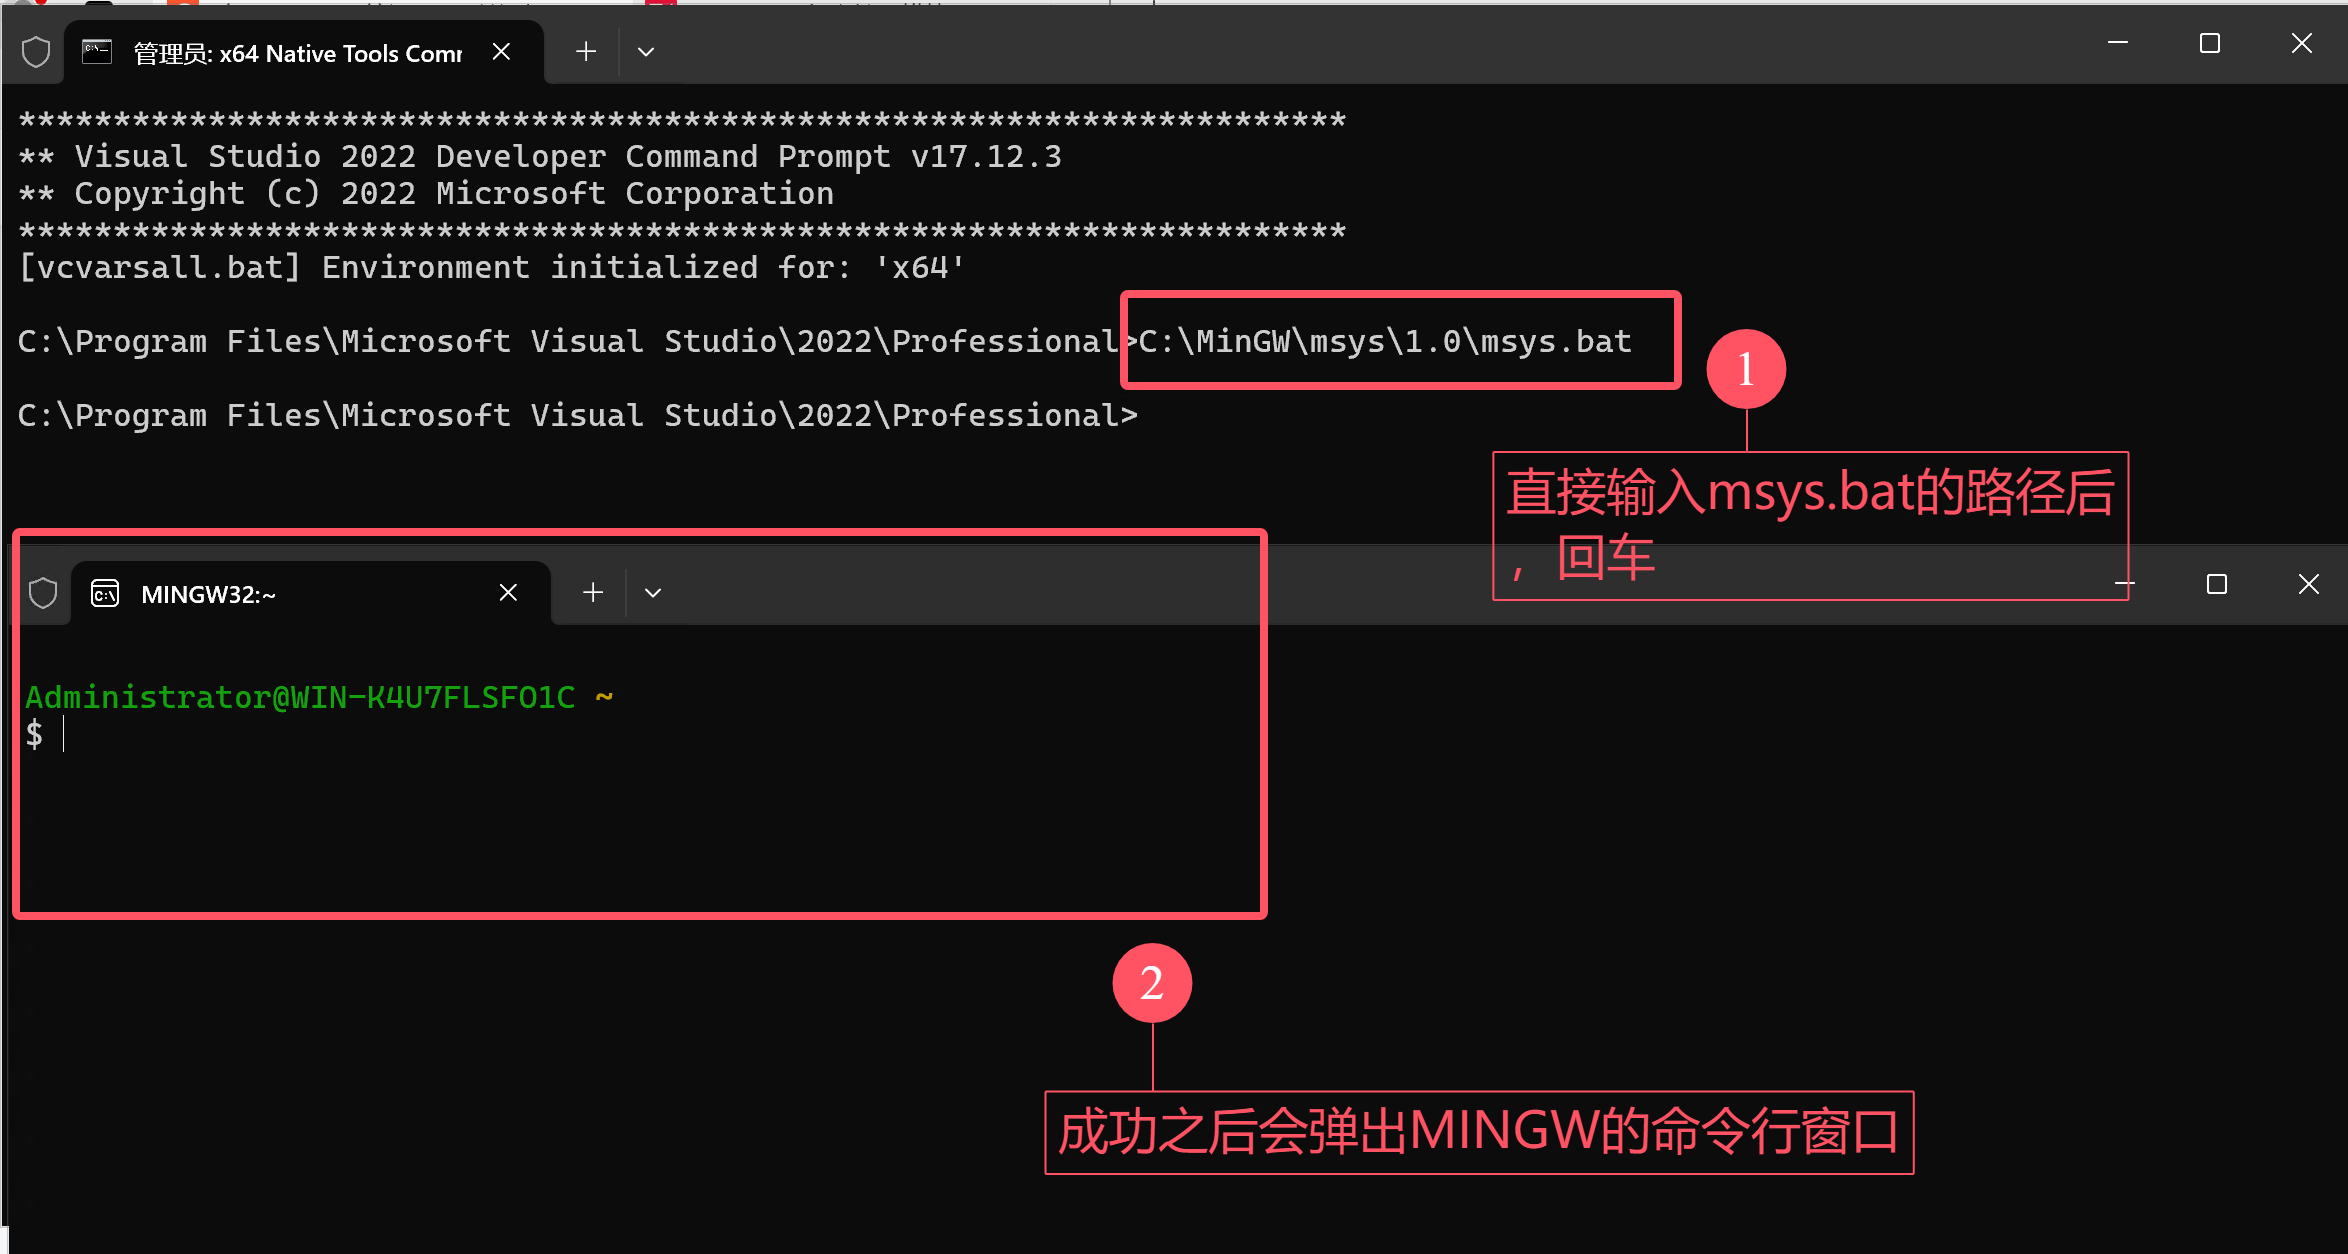
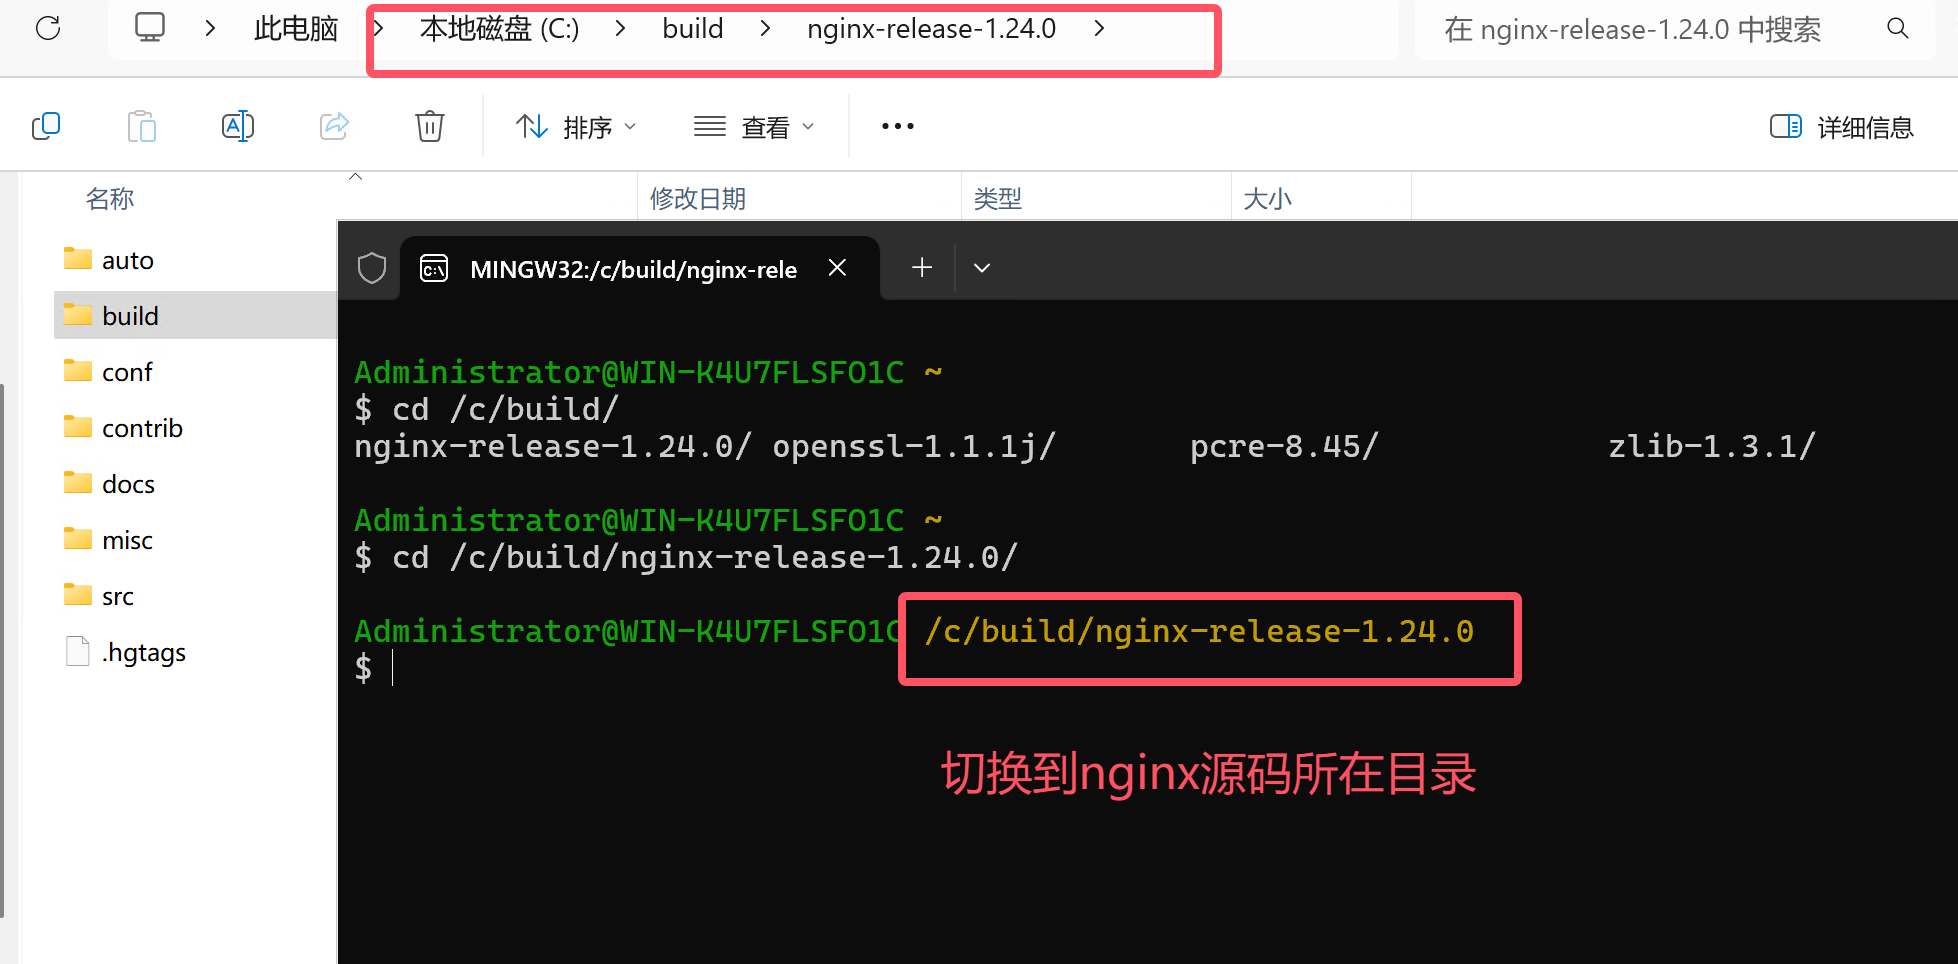
以管理员身份打开x64 Native Tools Command Prompt for VS 2022 命令行工具,切换到msys.bat所在的目录,这个文件所在的路径跟你当时安装MSYS的路径有关,默认安装的话,路径是:”C:\MinGW\msys\1.0\msys.bat”
在MINGW32的命令行窗口中使用Linux的命令切换到nginx源码所在目录
下面是一段基础的配置指令,可以在此基础上增删改,其中涉及到依赖路径的地方需要关注一下;其中的一些配置不清楚具体含义的可以自行搜索
auto/configure \
--with-cc=cl \
--builddir=build \
--with-debug \
--prefix= \
--conf-path=conf/nginx.conf \
--pid-path=logs/nginx.pid \
--http-log-path=logs/access.log \
--error-log-path=logs/error.log \
--sbin-path=nginx.exe \
--http-client-body-temp-path=temp/client_body_temp \
--http-proxy-temp-path=temp/proxy_temp \
--http-fastcgi-temp-path=temp/fastcgi_temp \
--http-scgi-temp-path=temp/scgi_temp \
--http-uwsgi-temp-path=temp/uwsgi_temp \
--with-cc-opt=-DFD_SETSIZE=1024 \
--with-pcre=build/lib/pcre2-10.35 \
--with-zlib=build/lib/zlib-1.2.13 \
--with-http_v2_module \
--with-http_realip_module \
--with-http_addition_module \
--with-http_sub_module \
--with-http_dav_module \
--with-http_stub_status_module \
--with-http_flv_module \
--with-http_mp4_module \
--with-http_gunzip_module \
--with-http_gzip_static_module \
--with-http_auth_request_module \
--with-http_random_index_module \
--with-http_secure_link_module \
--with-http_slice_module \
--with-mail \
--with-stream \
--with-openssl=build/lib/openssl-1.1.1s \
--with-openssl-opt='no-asm no-tests -D_WIN32_WINNT=0x0501' \
--with-http_ssl_module \
--with-mail_ssl_module \
--with-stream_ssl_module \
--with-stream_ssl_preread_module
笔者使用的如下:
auto/configure \
 --with-cc=cl \
 --with-cc-opt="-DFD_SETSIZE=1024 -I build/lib/GD/include" \
 --with-ld-opt="build/lib/GD/lib/libgd.lib" \
 --builddir=build \
 --with-debug \
 --prefix= \
 --conf-path=conf/nginx.conf \
 --pid-path=logs/nginx.pid \
 --http-log-path=logs/access.log \
 --error-log-path=logs/error.log \
 --sbin-path=nginx.exe \
 --http-client-body-temp-path=temp/client_body_temp \
 --http-proxy-temp-path=temp/proxy_temp \
 --http-fastcgi-temp-path=temp/fastcgi_temp \
 --http-scgi-temp-path=temp/scgi_temp \
 --http-uwsgi-temp-path=temp/uwsgi_temp \
 --with-pcre=build/lib/pcre-8.45 \
 --with-zlib=build/lib/zlib-1.3.1 \
 --with-select_module \
 --with-http_v2_module \
 --with-http_realip_module \
 --with-http_addition_module \
 --with-http_sub_module \
 --with-http_dav_module \
 --with-http_stub_status_module \
 --with-http_flv_module \
 --with-http_mp4_module \
 --with-http_gunzip_module \
 --with-http_gzip_static_module \
 --with-http_auth_request_module \
 --with-http_random_index_module \
 --with-http_secure_link_module \
 --with-http_slice_module \
 --with-mail \
 --with-stream \
 --with-openssl=build/lib/openssl-1.1.1j \
 --with-openssl-opt='no-asm no-tests -D_WIN32_WINNT=0x0501' \
 --with-http_ssl_module \
 --with-mail_ssl_module \
 --with-stream_ssl_module \
 --with-stream_ssl_preread_module \
 --with-http_image_filter_module
在nginx源码目录下执行指令之后,与“GD”有关的输出显示“found”就没啥问题了,成功后的截图如下:

四、编译
使用已经打开的x64 Native Tools Command Prompt for VS 2022 命令行工具或者重新管理员身份打开一个新的x64 Native Tools Command Prompt for VS 2022 命令行窗口,切换目录到nginx源码目录下,然后执行 nmake -f build/Makefile ,等待编译完成!!
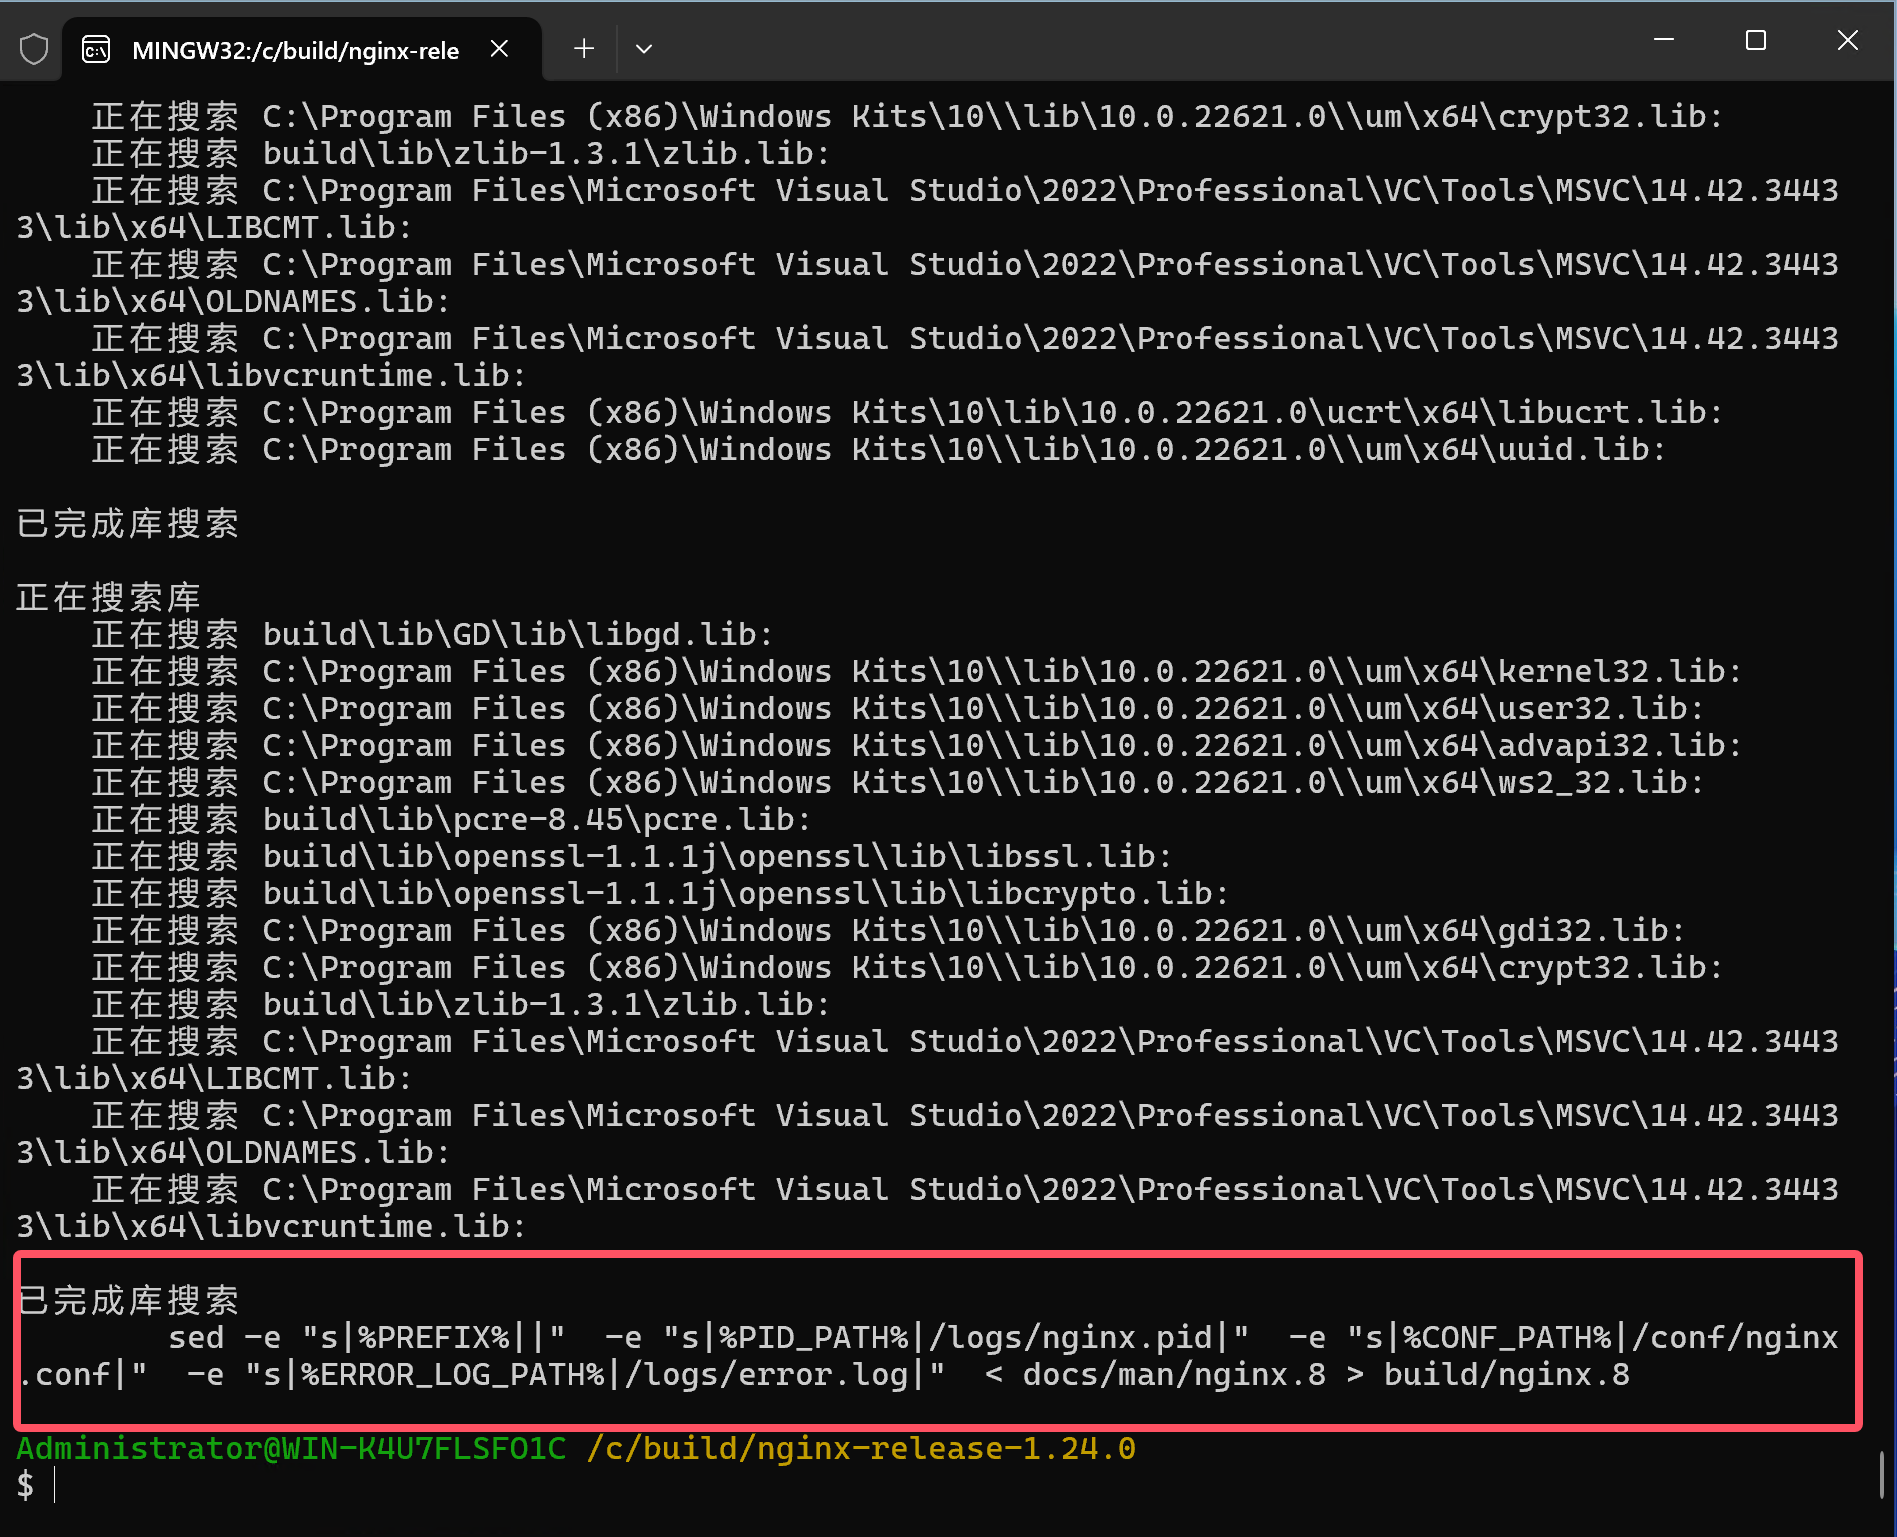
编译命令执行后的初始效果如下图所示:

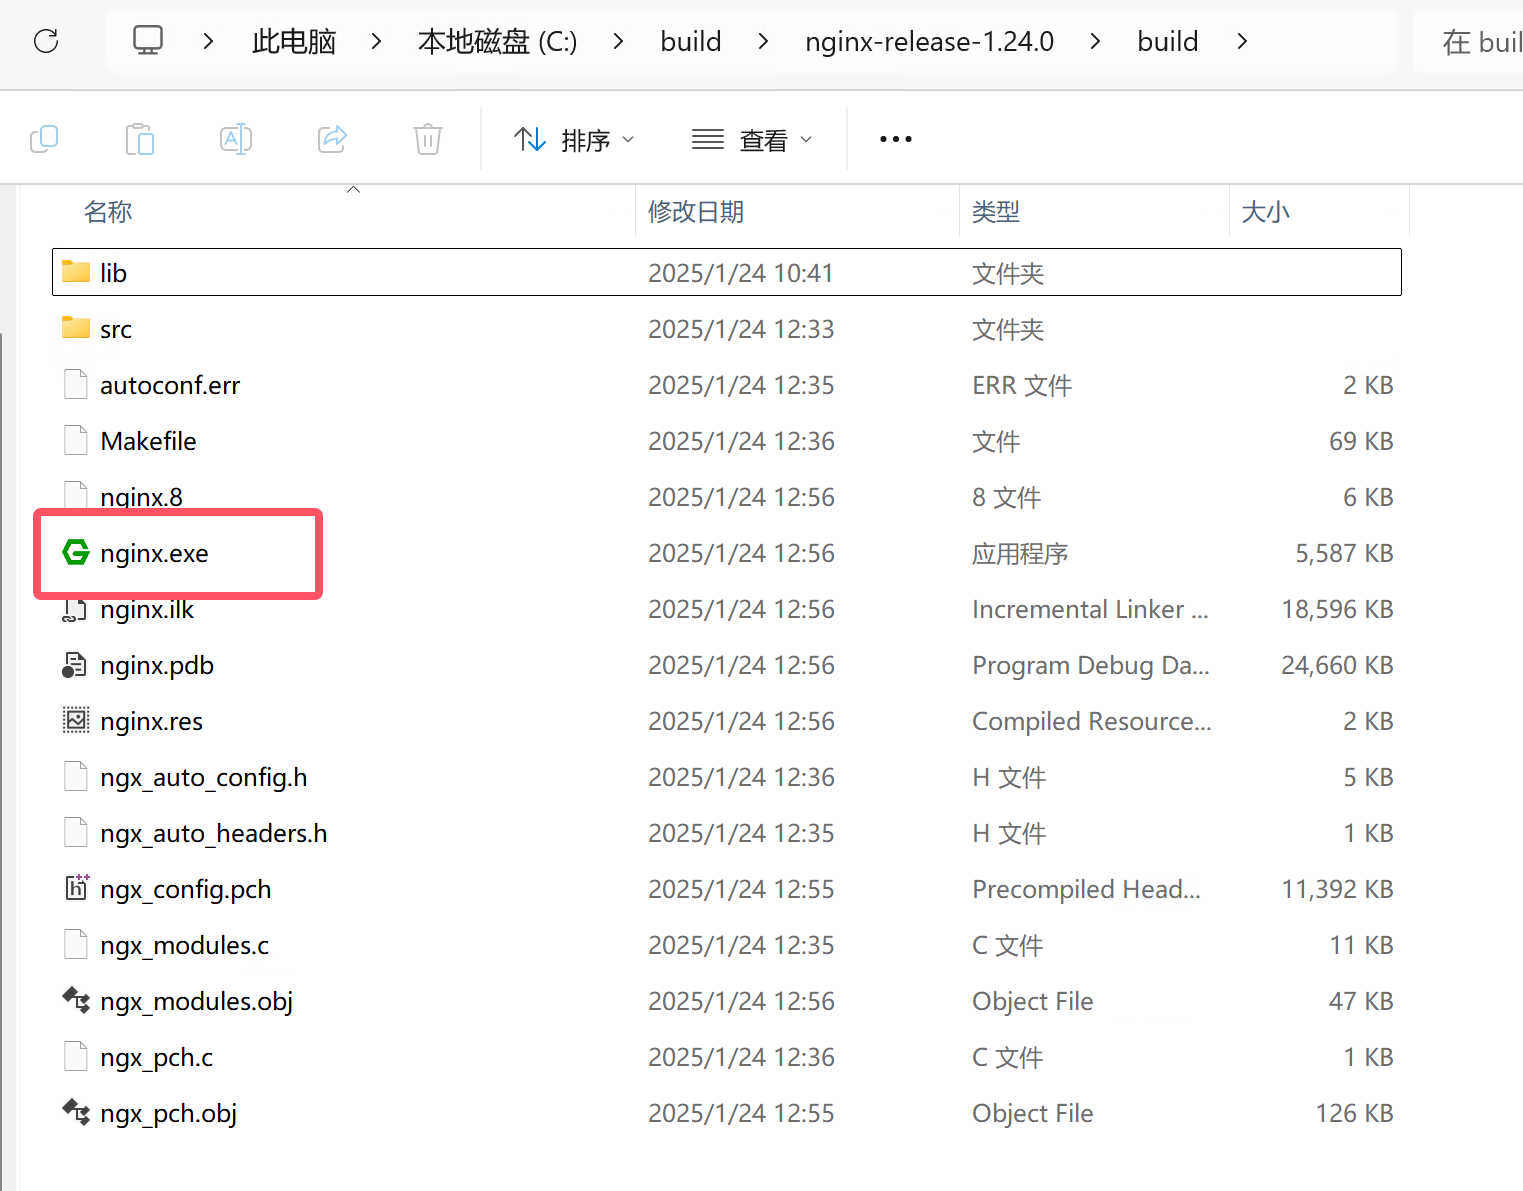
成功编译之后如下图所示,此时可以在build目录中看到编译完成的nginx.exe文件!!
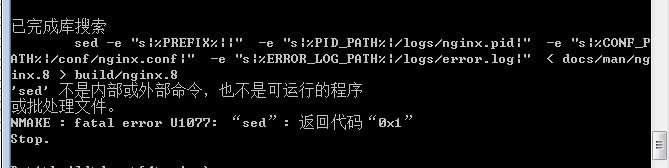
如果出现如下图所示的错误也没事,不用管,已经编译成功!!
创建整体Nginx
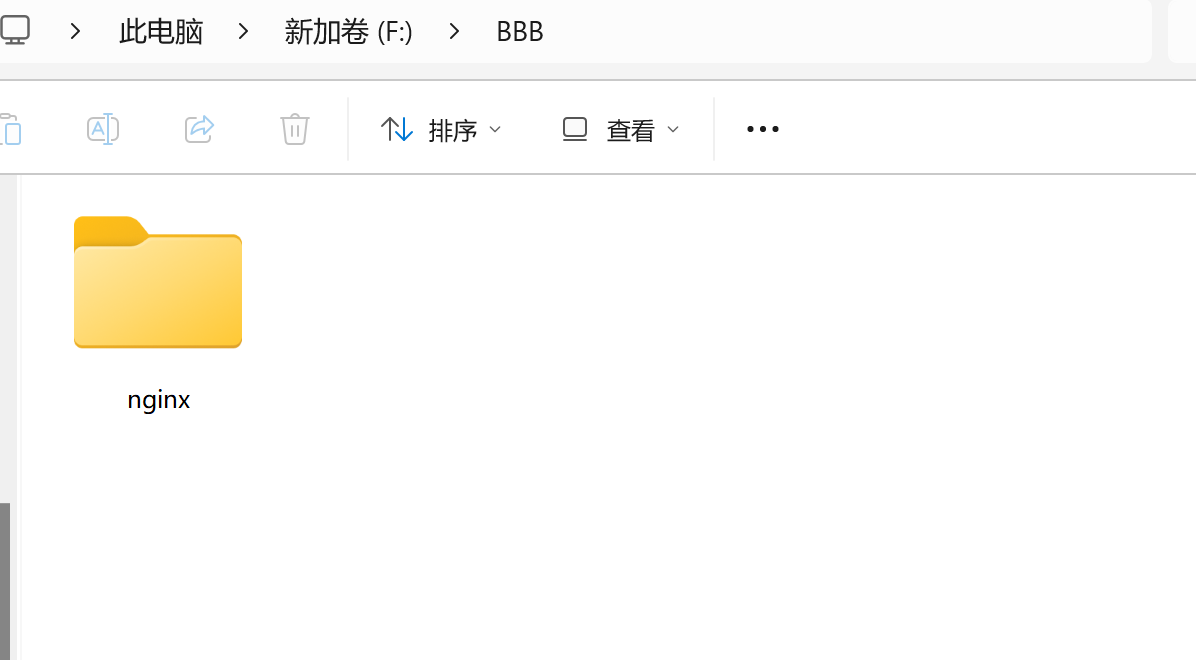
一、新建nginx文件夹
二、拷贝源码中的conf、contrib、docs文件夹,docs文件夹可选

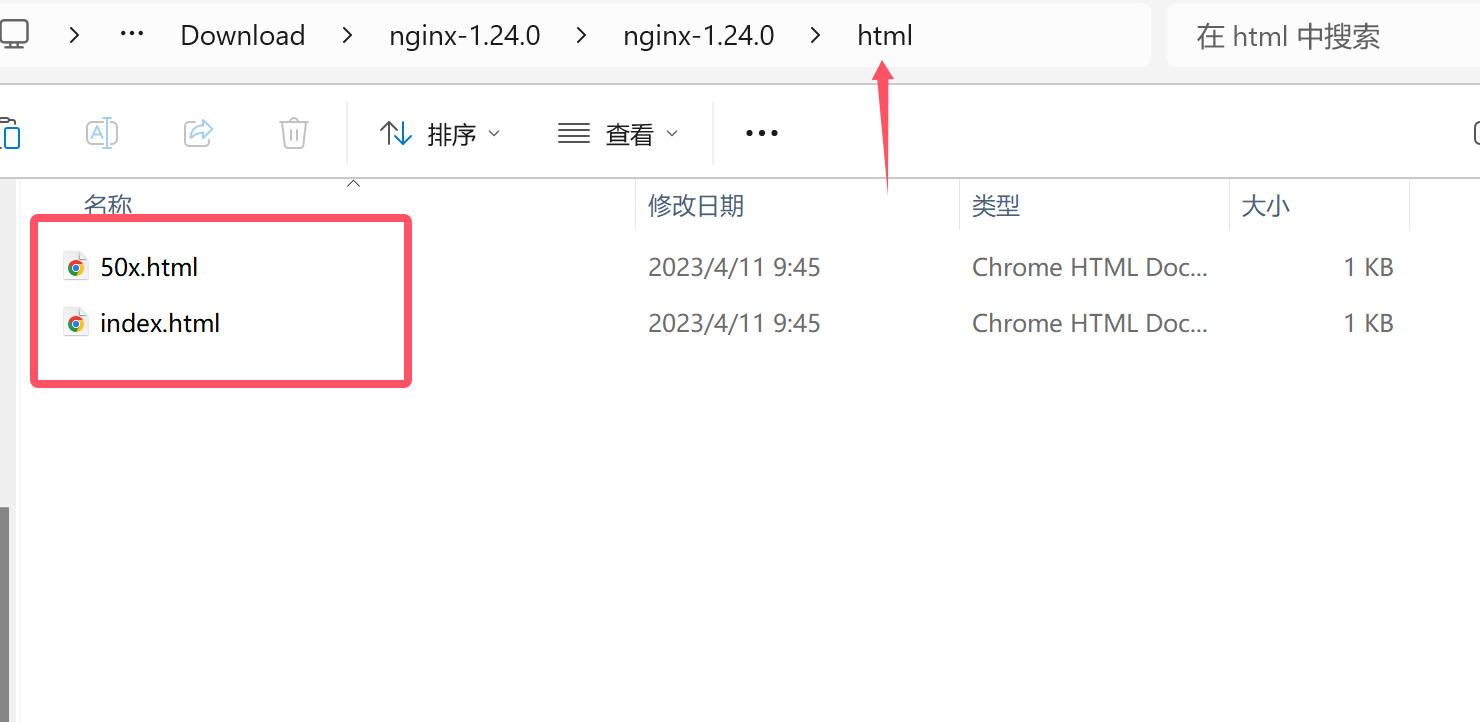
三、拷贝官方编译好的版本中的html
这里给一个Windows版本官方编译好的nginx-1.24.0版本的下载地址,html文件可以去里面获取
四、拷贝build目录中生成的nginx.exe
五、新建logs和temp文件夹
最终的文件目录如图:

后续
问题
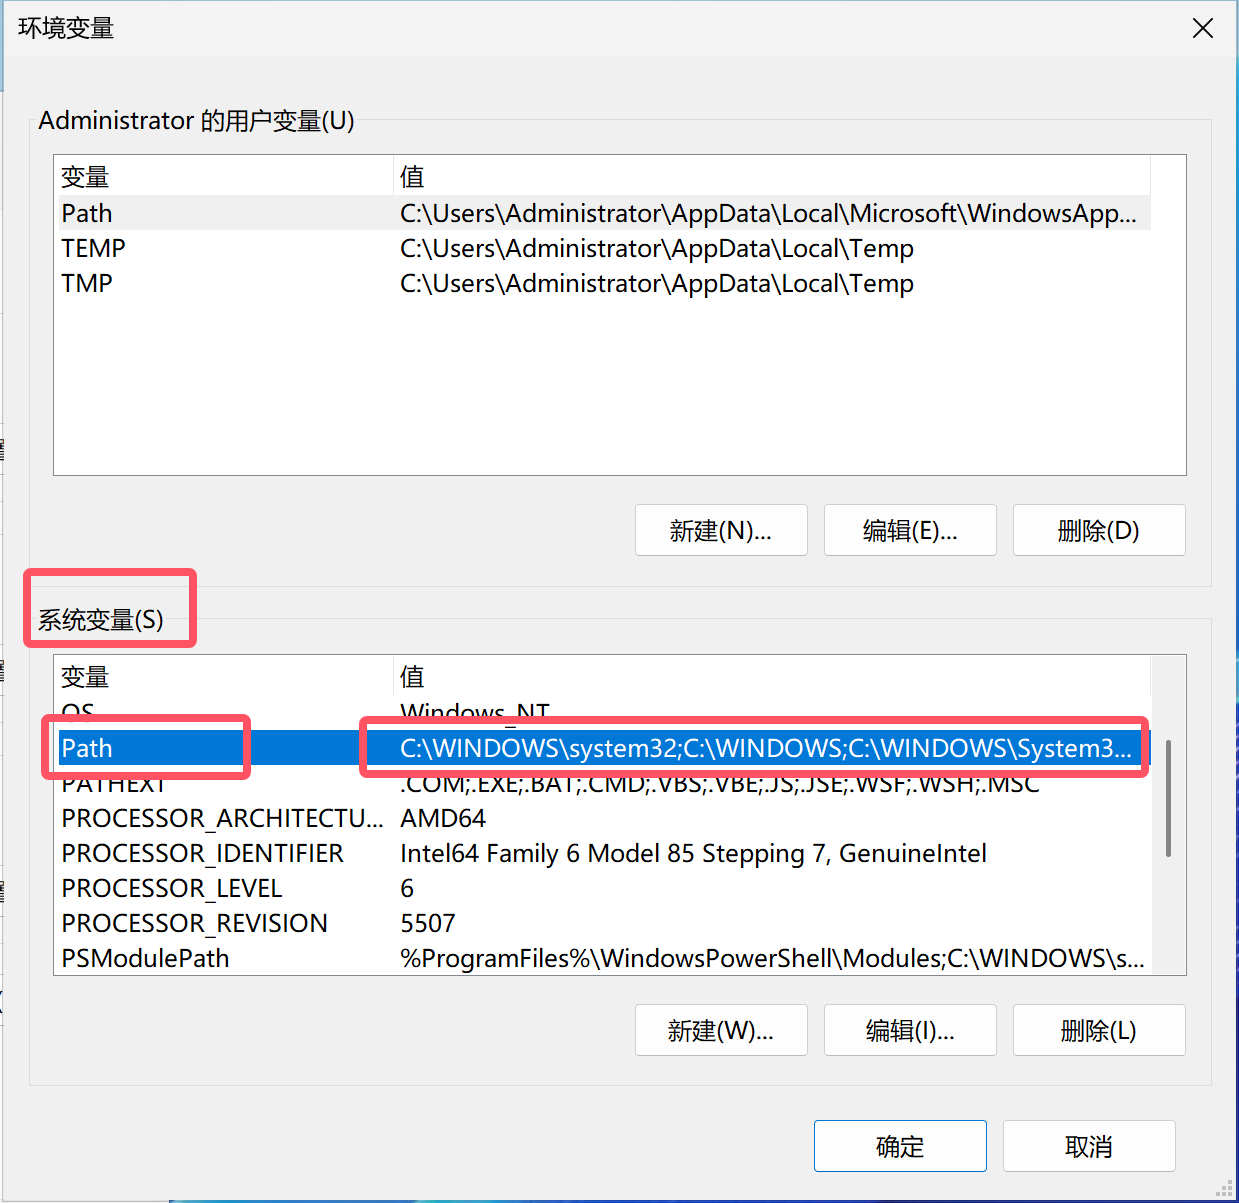
添加http_image_filter_module模块支持的Windows版本nginx直接运行,可能会报以下错误:
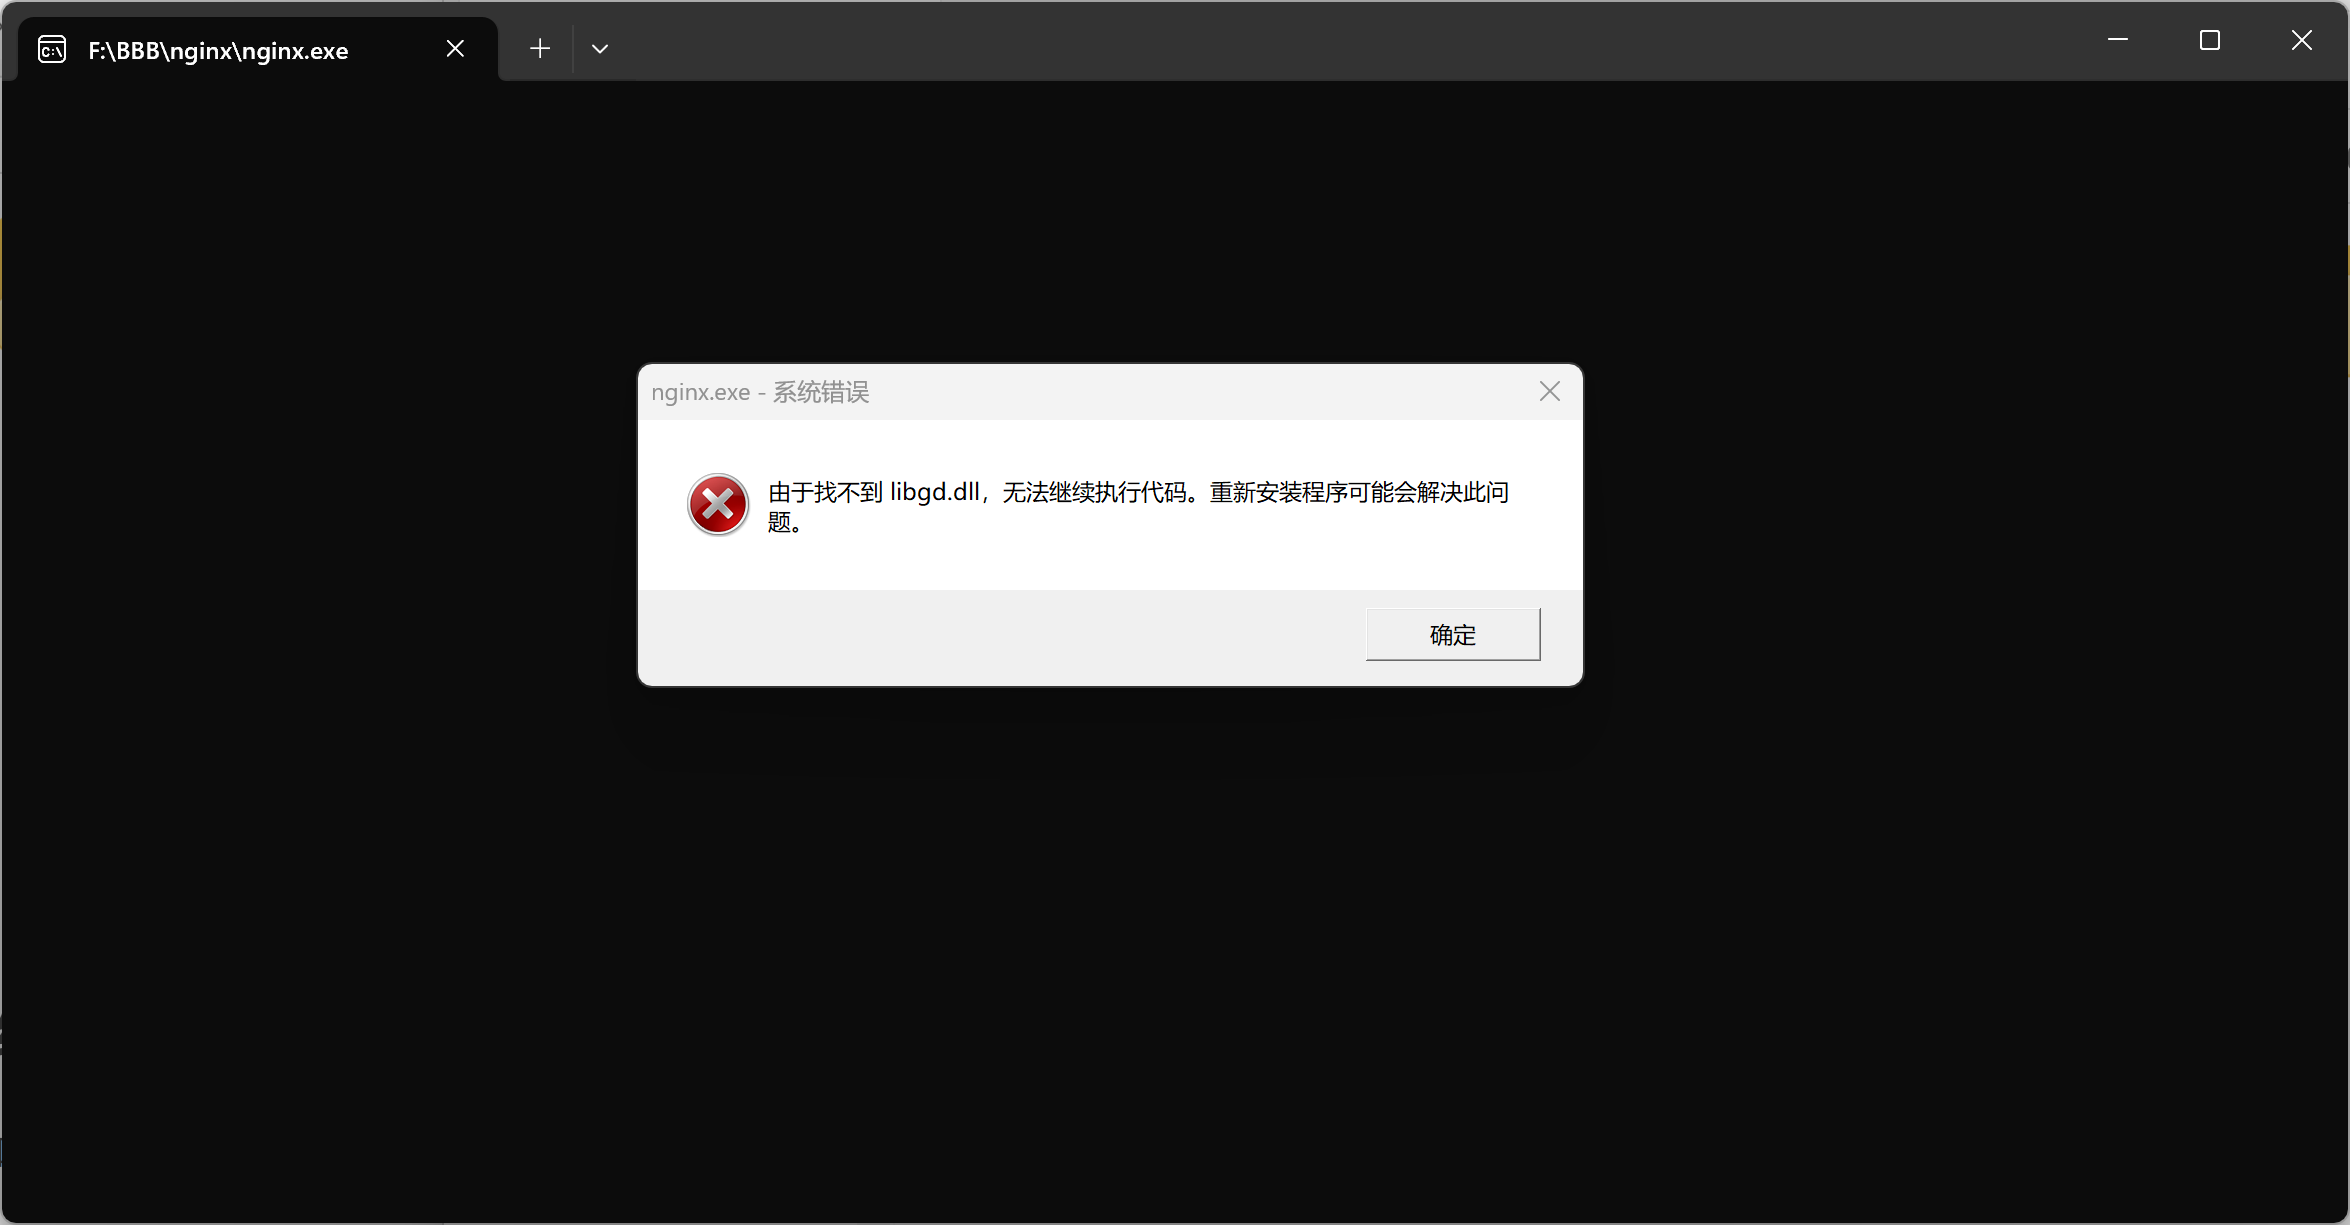
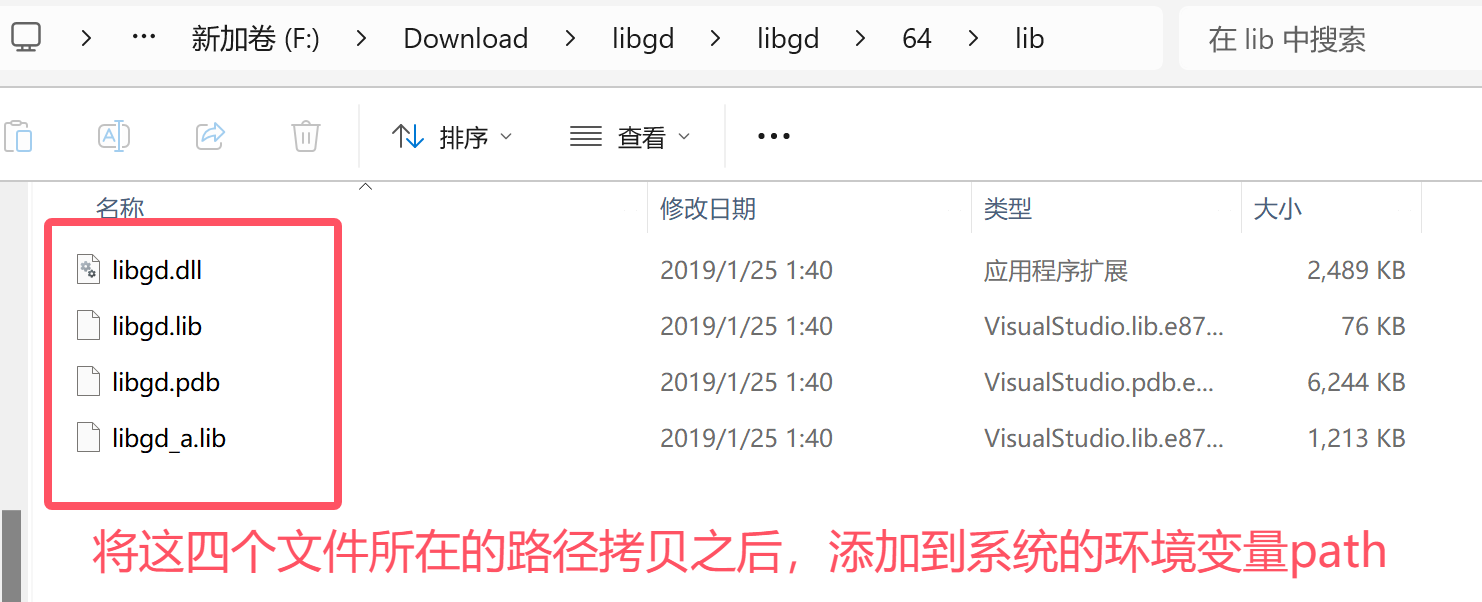
此时,需要将我们之前编译好的libgd.dll动态链接库添加到系统变量当中
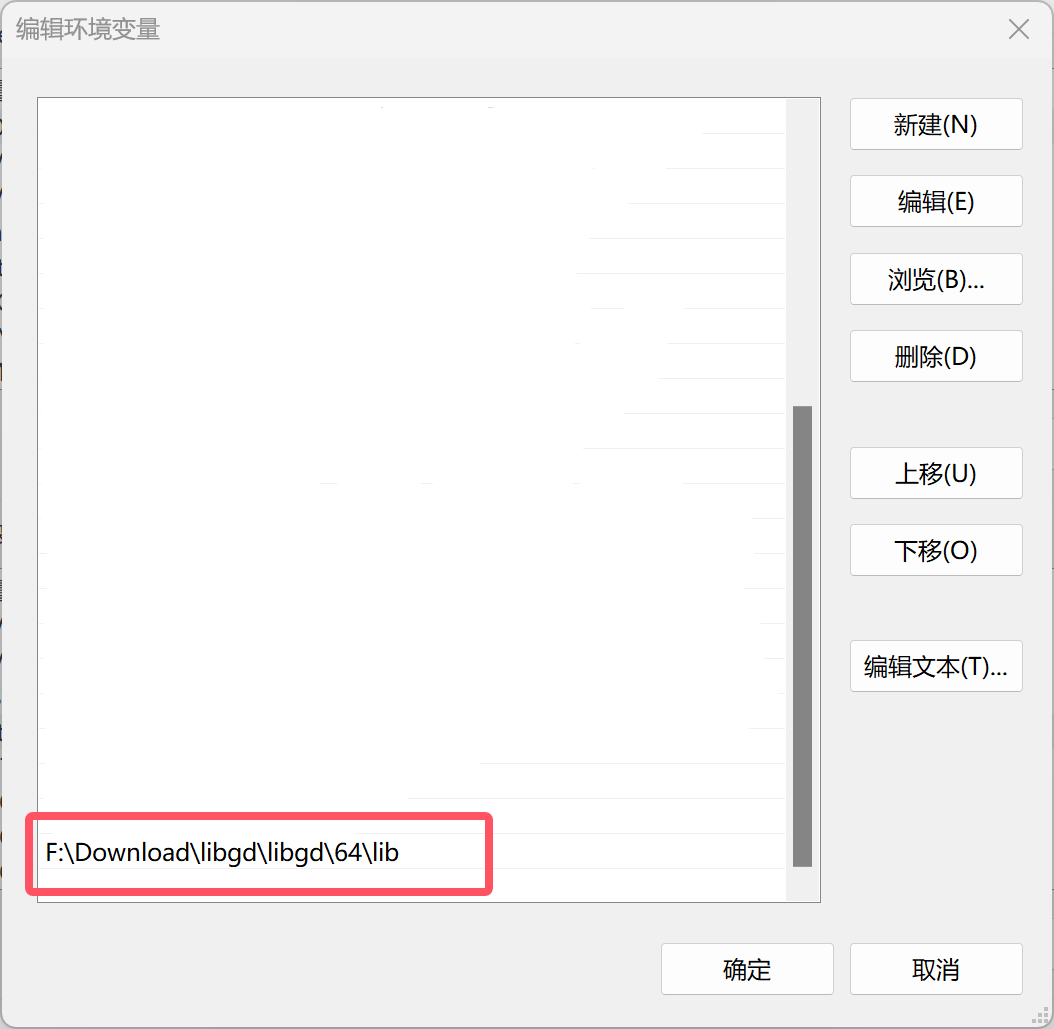
此时启动nginx就不会再报错了,任务管理器中也能看到后台运行的nginx
nginx的两个命令
可以在nginx.exe所在目录打开命令行终端
执行nginx.exe -V可以查看nginx的版本、编译器信息、编译参数、模块支持、系统路径
nginx.exe -V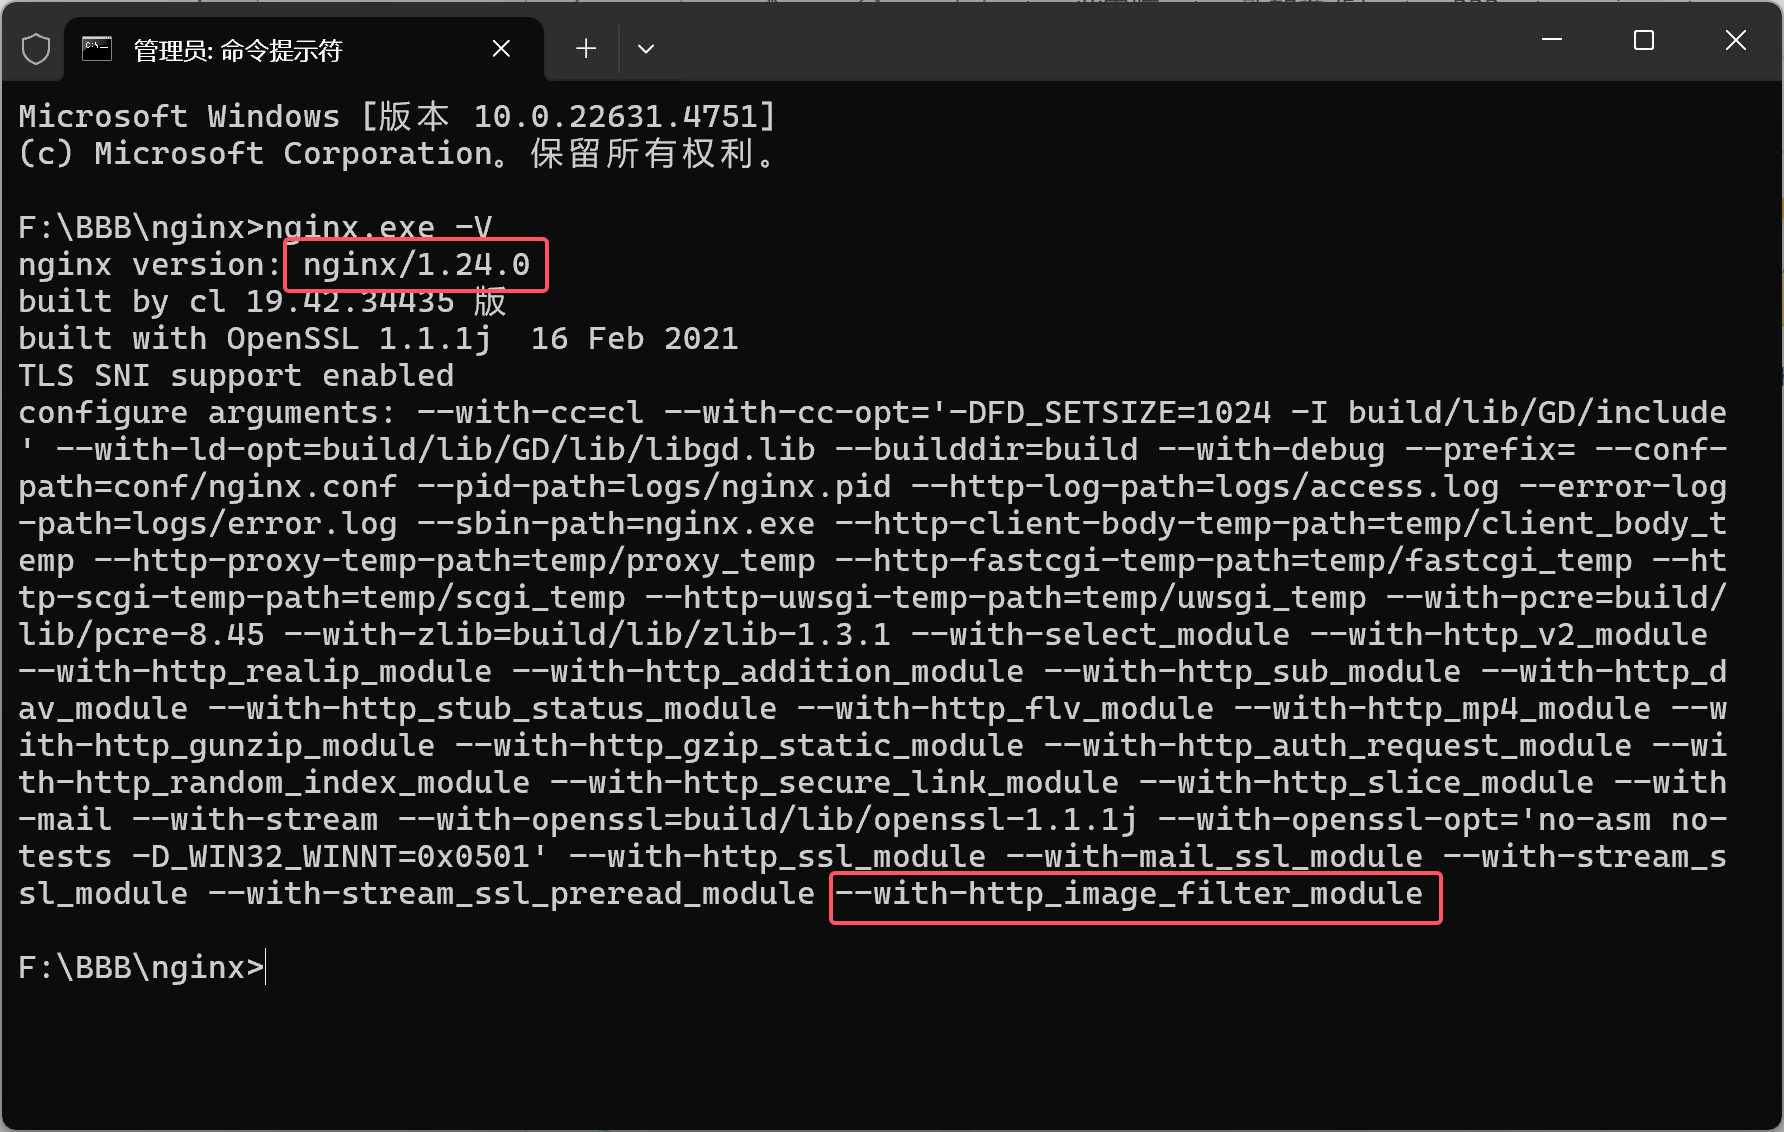
执行nginx.exe -t 可以测试 Nginx 配置文件是否正确,而不启动或重启服务
nginx.exe -t执行之后类似以下的输出结果就表示配置文件测试通过
nginx: the configuration file C:/path/to/nginx.conf syntax is ok
nginx: configuration file C:/path/to/nginx.conf test is successful
其他
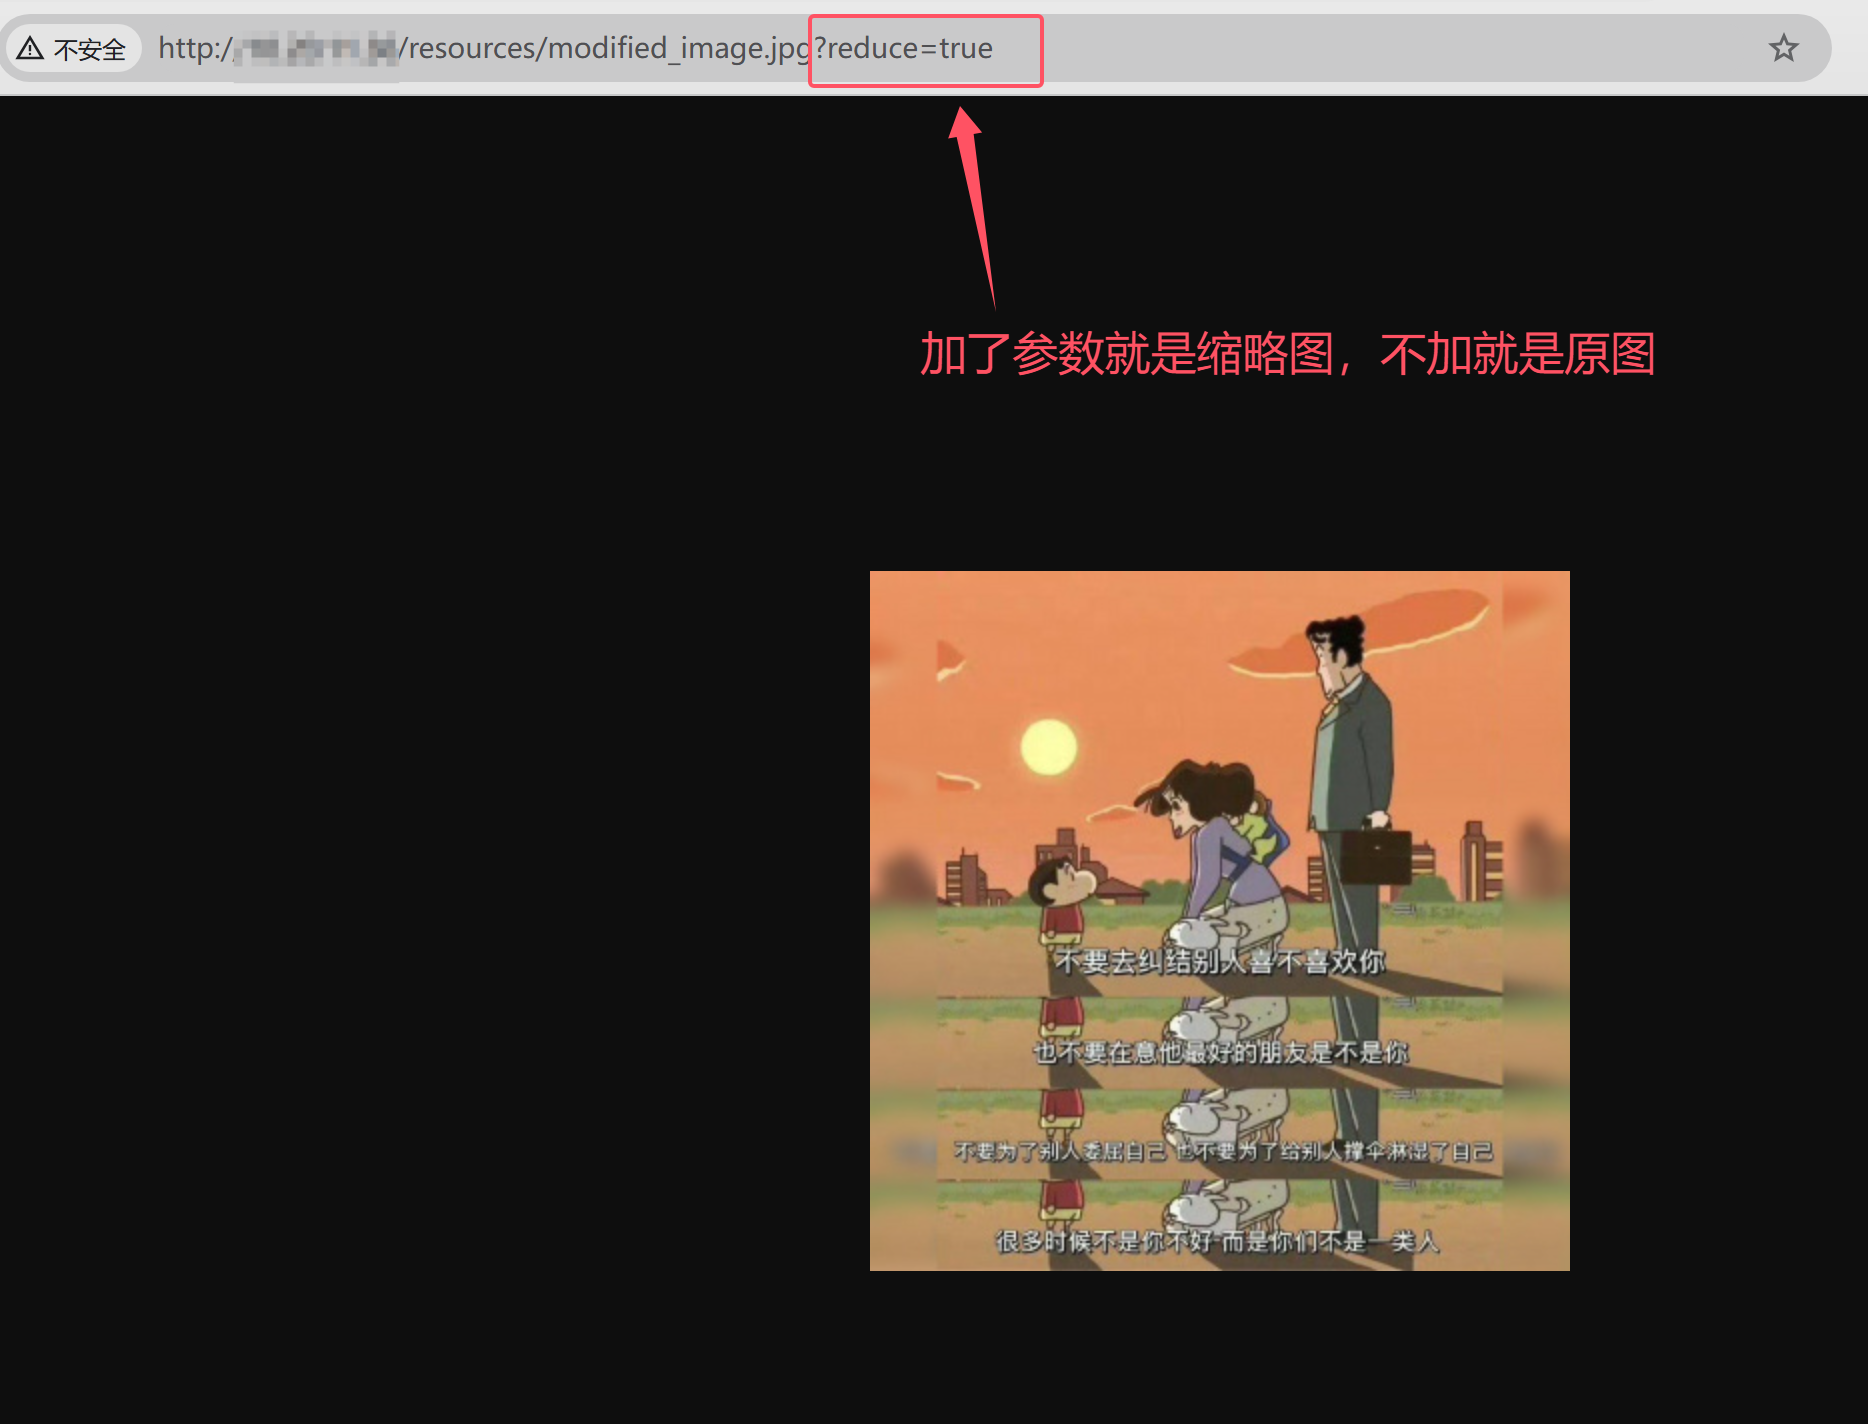
我们可以来测试一下http_image_filter_module的使用
参考教程 地址
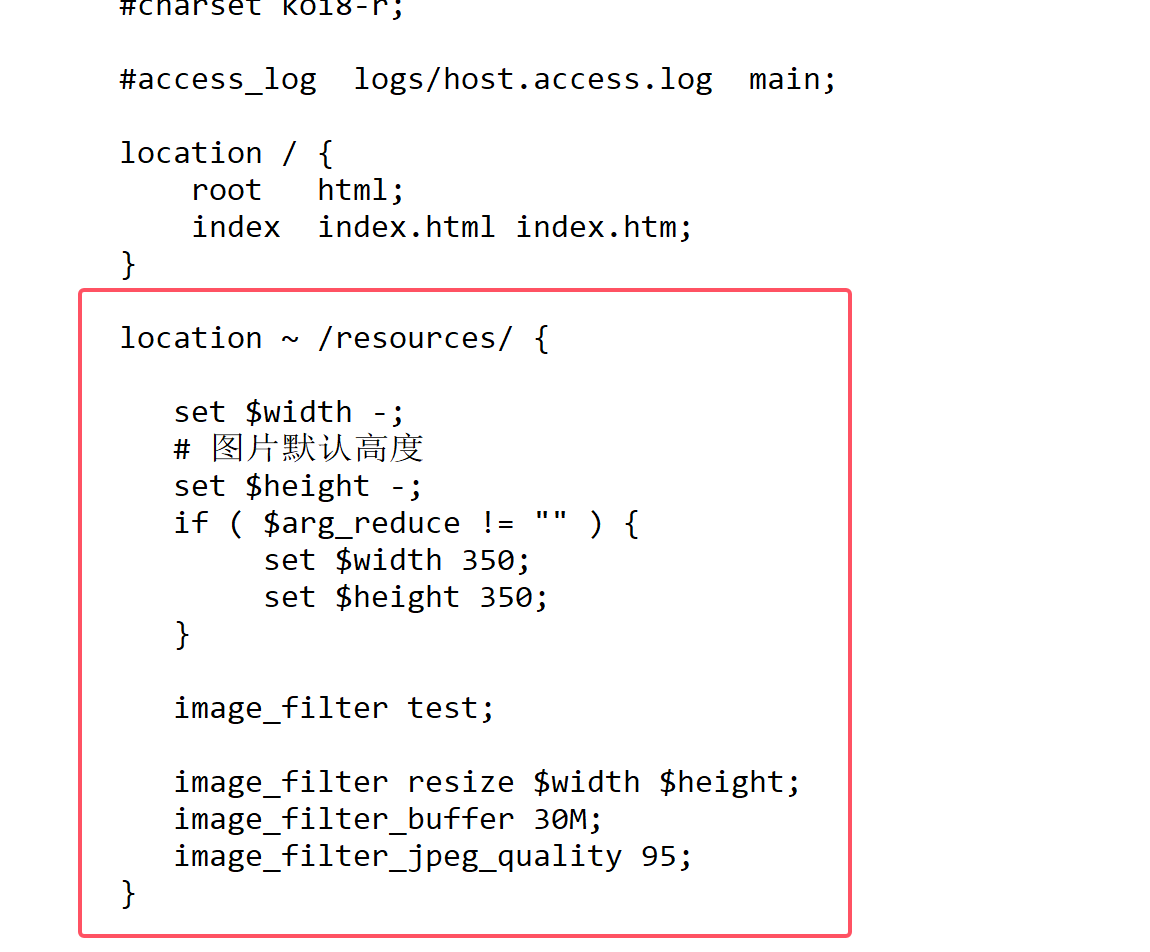
nginx.conf中添加如下配置
在html文件夹中新建resources文件夹,并在里面放入一张测试用图片

重启nginx之后就可以看效果了